Join us for a momentous event: the 30th Annual IWGKS Koi Show! We will hold the show at Edwards Greenhouse on September 14, 2024, 10am-4pm. The event is free and open to the public. Come see amazing koi, bonsai, taiko drummers, vendors of koi and koi supplies and great food trucks. Kid friendly event with activities and excitement.
Join Now! Click below to join with Paypal
PNKCA coming to Boise! Save the Date!

IWGKS 2018 Annual Pond Tour
June 21- 10am-2pm and Sunday 12-4pm. Price: $15 per adult IWGKS.org Experience the Soothing Sounds of A Water Feature and the Beauty Within! The Idaho Water Garden and Koi Society welcomes you to a one day, self-guided pond tour of uniquely beautiful ponds and gardens covering Boies, Garden City, Kuna and Nampa. The tour will display the many varieties of koi…living jewels of the pond and the ecosystem they exist in. No two ponds are alike and you will be able to learn what makes a great and unique pond. Take your time to enjoy, observe and ask questions you may have about koi, plants, equipment and pond design so that one day, you too can create your own water paradise. The tour route and ponds for viewing will be presented in the tour ticket/email. Tickets will be available for online purchase and at pond and gardening retailers in June. For more information, please visit us at http://IWGKS.org

Early June update, Part 1
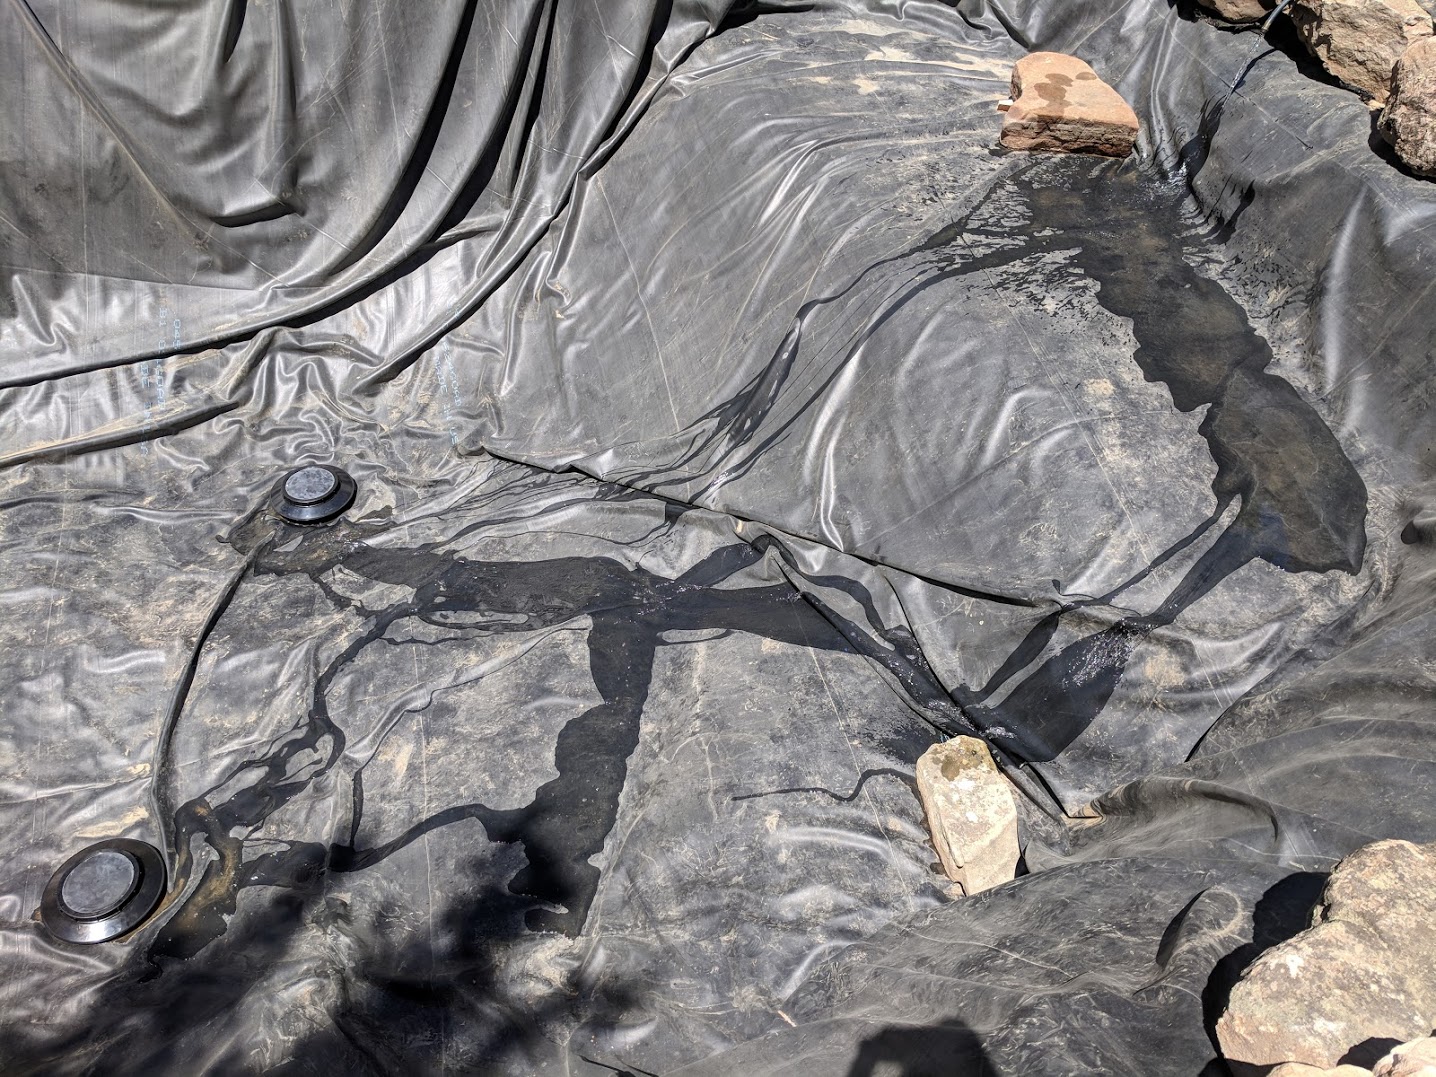
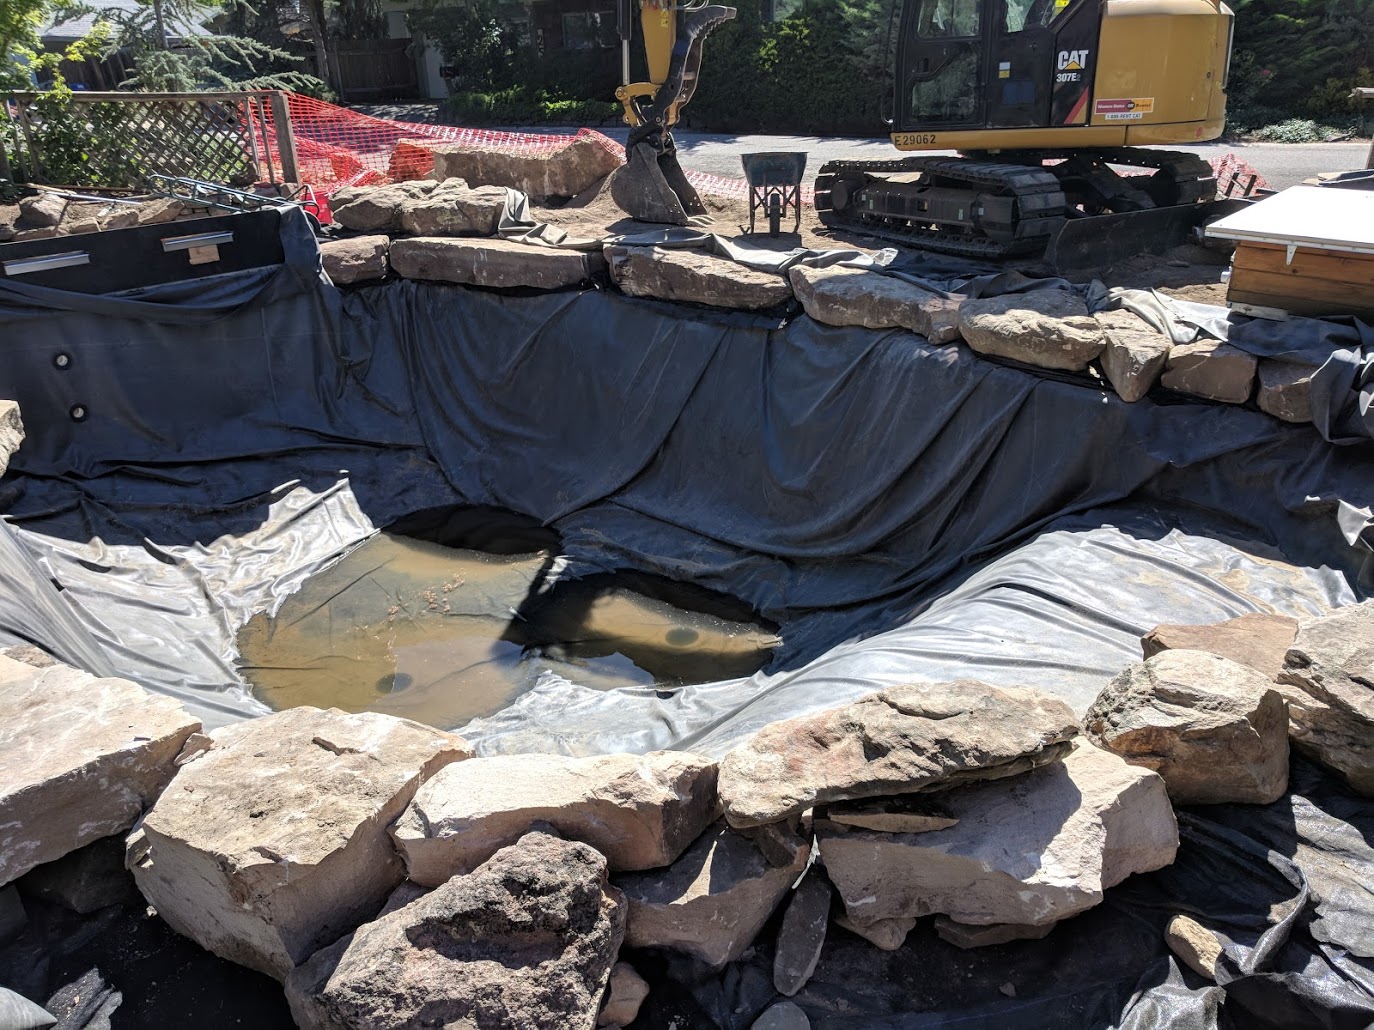
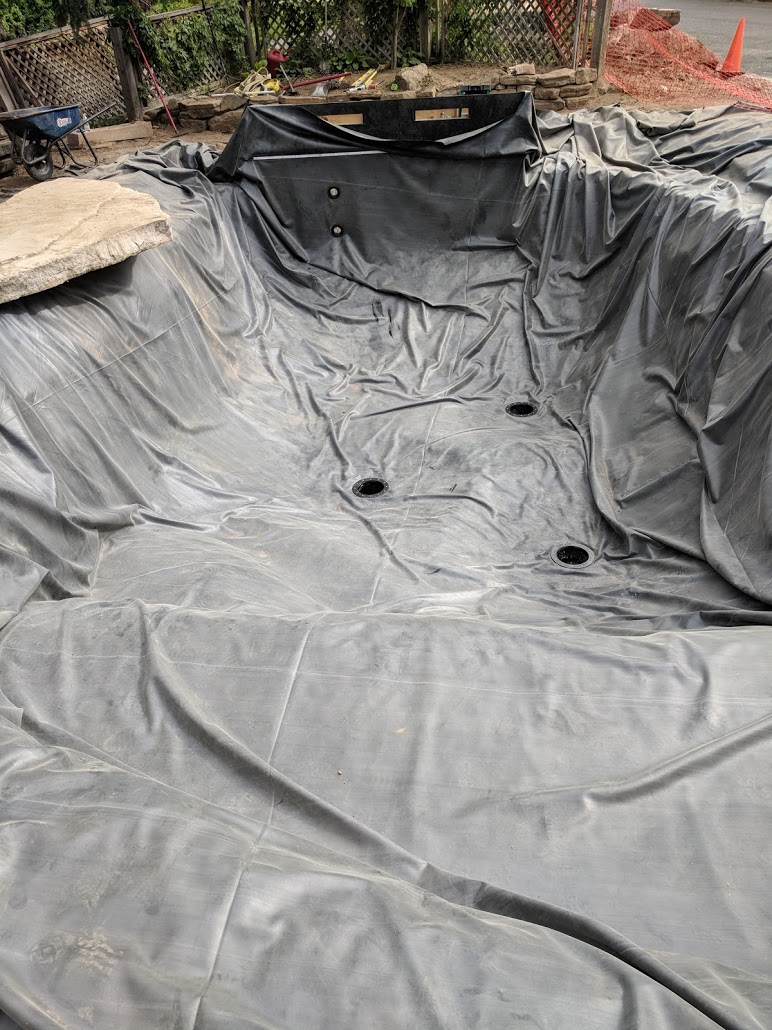
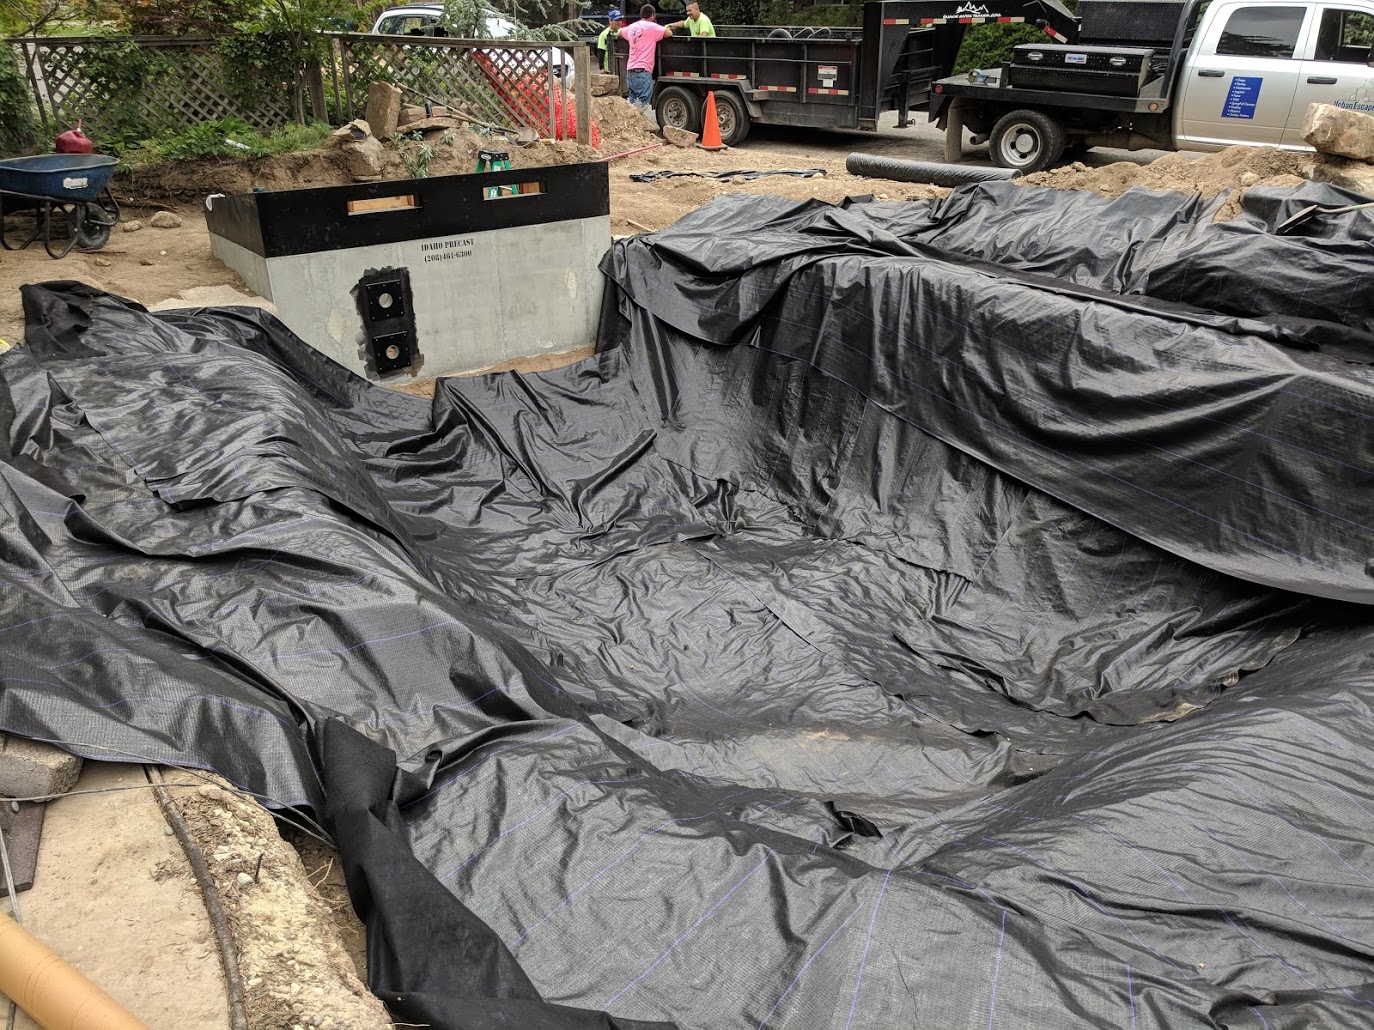
The Urban Escapes crew wrapped up most of their work on May 29th. They left with rocks placed and the pond ready to start filling. That week, I sprayed off the liner and any loose dirt I found on the rocks. That Thursday Mother Nature did me a solid and blew in a huge rain and hail storm that cleaned off most of the liner. After the storm, all I had to do was spray out between the boulders and pump out the bottom drains with a trash pump. After that, I sprayed area surrounding the bottom drains and use my wet/dry shop vac to suck the rest of the water out.
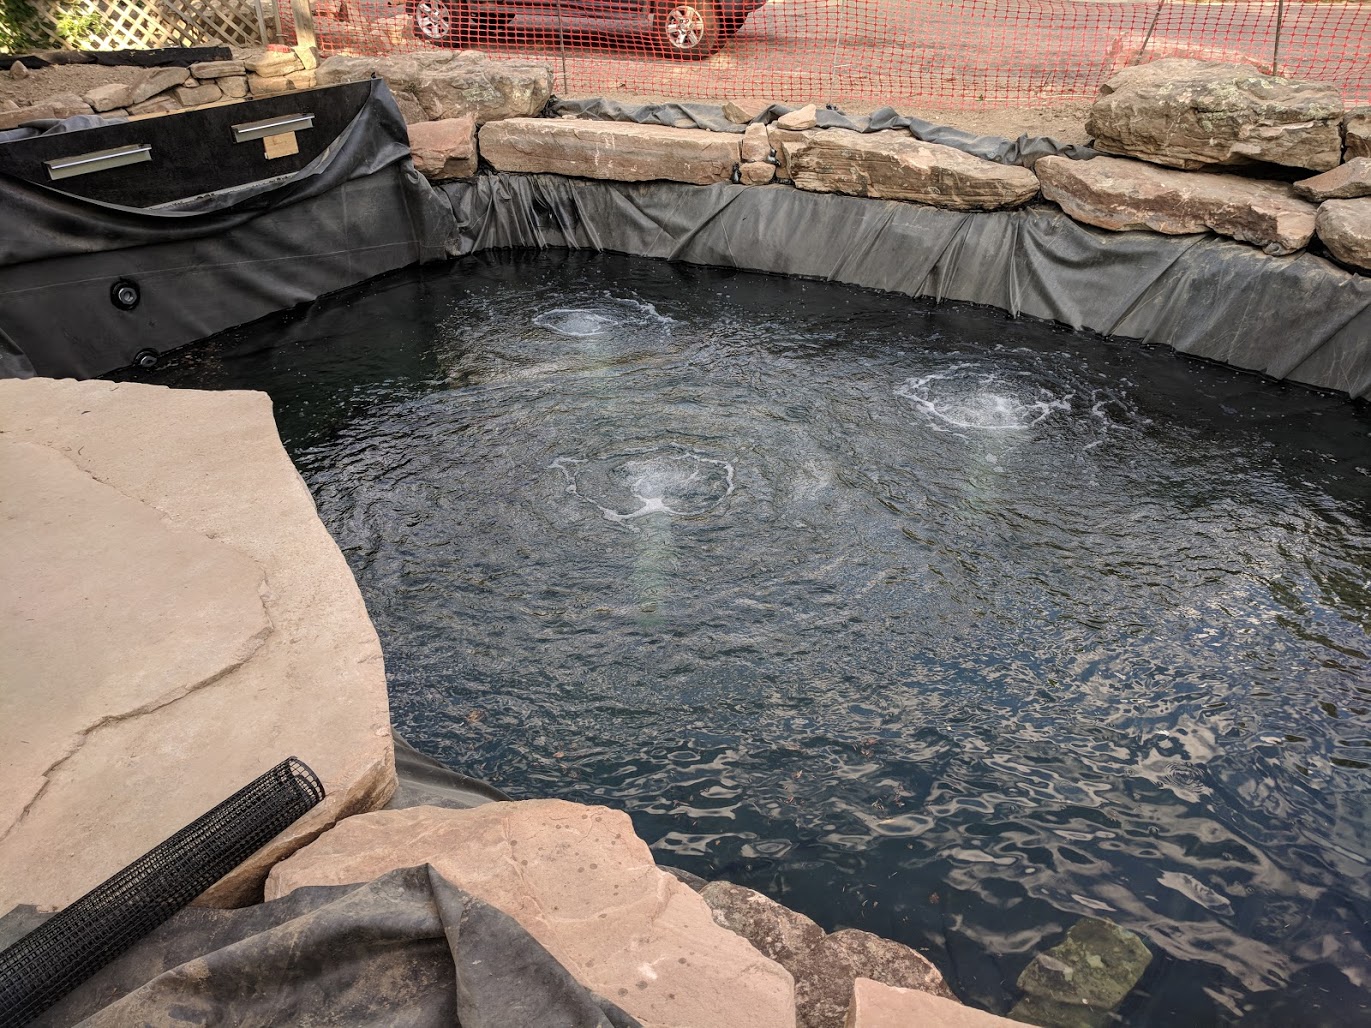
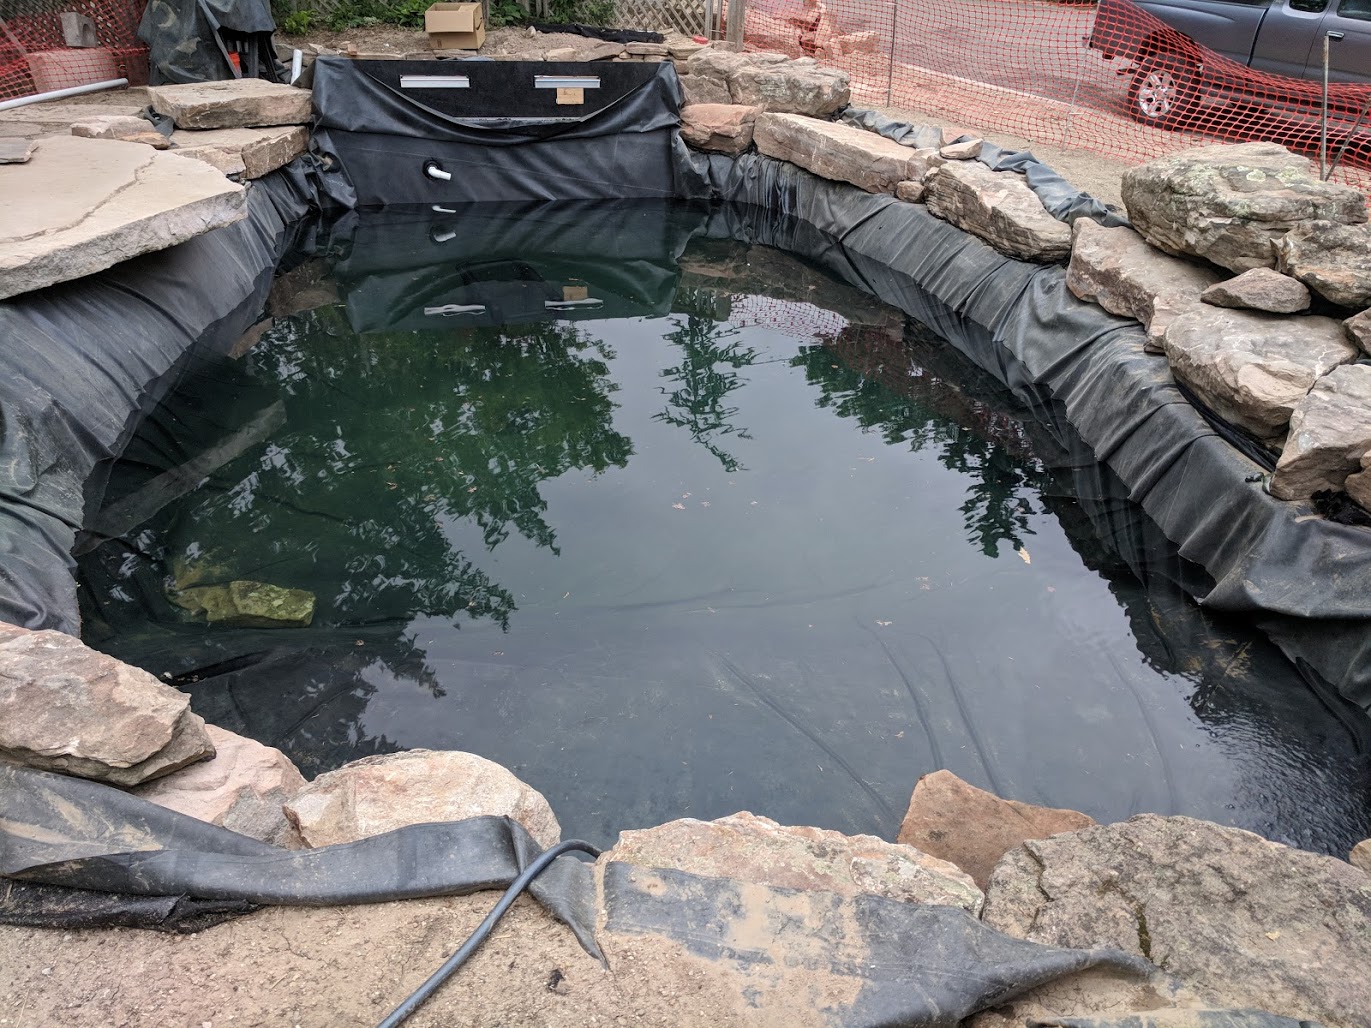
I started filling the pond on Sunday. My nephew came over to help and we slowly worked the liner wrinkles up to the outer edges of the pond as it filled. Filling slowly like this allows you to use the weight of water to hold the liner in place. It was a neat trick I learned while watching a video produced by a California company called The Pond Digger. That Sunday, we had the water about 24″ high from the top of the bottom drains. Over the course of last week I continued to fill the pond, plumb the filter outflow, and attach the Helix pond skimmer.


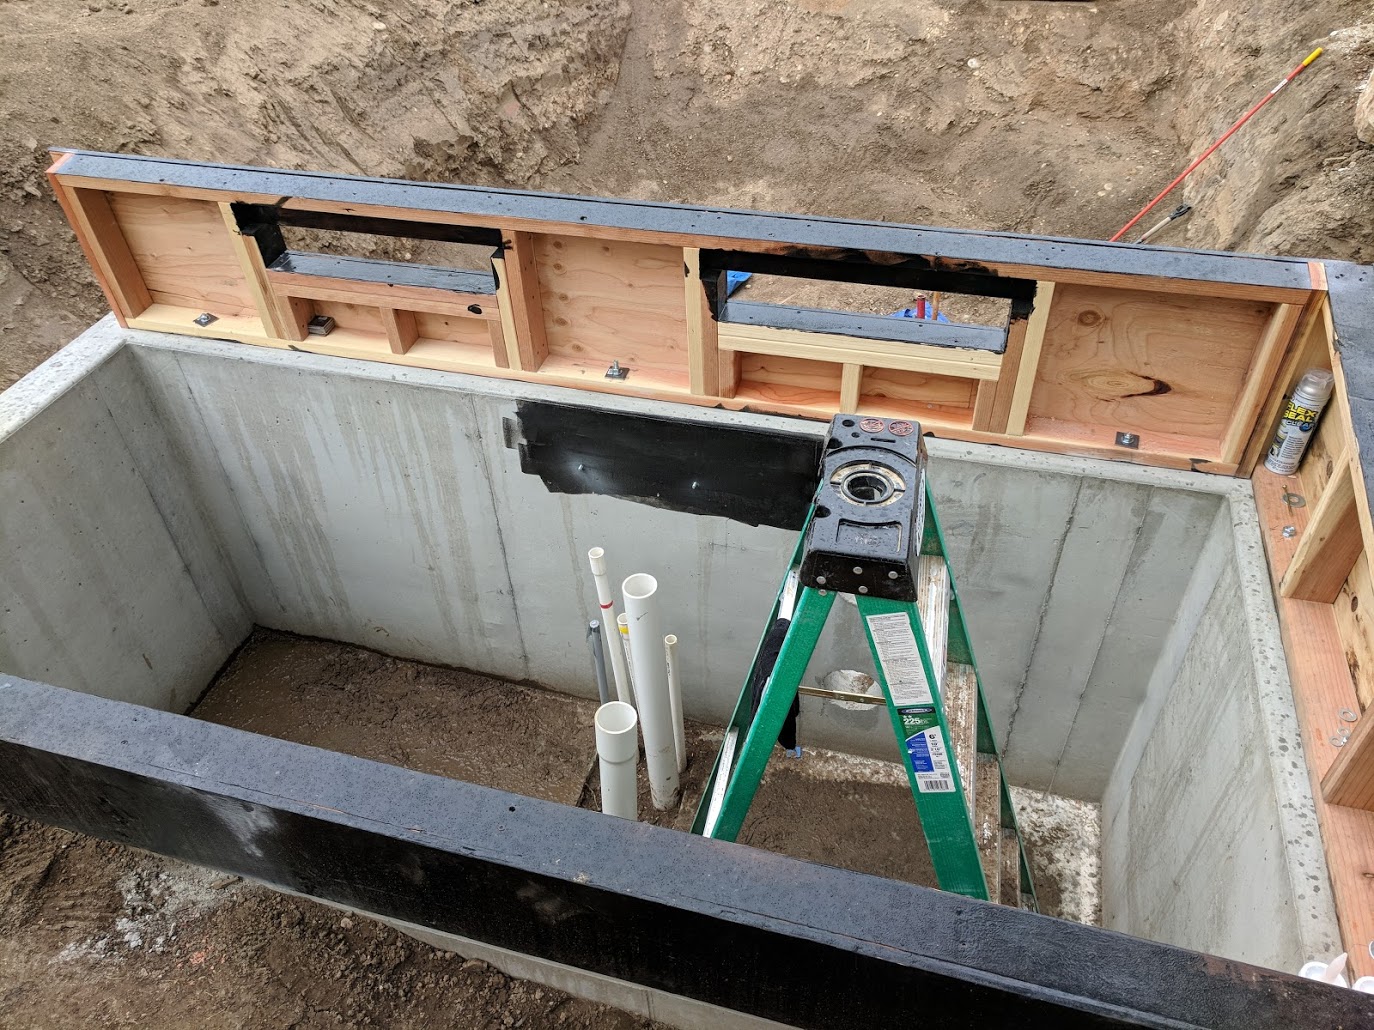
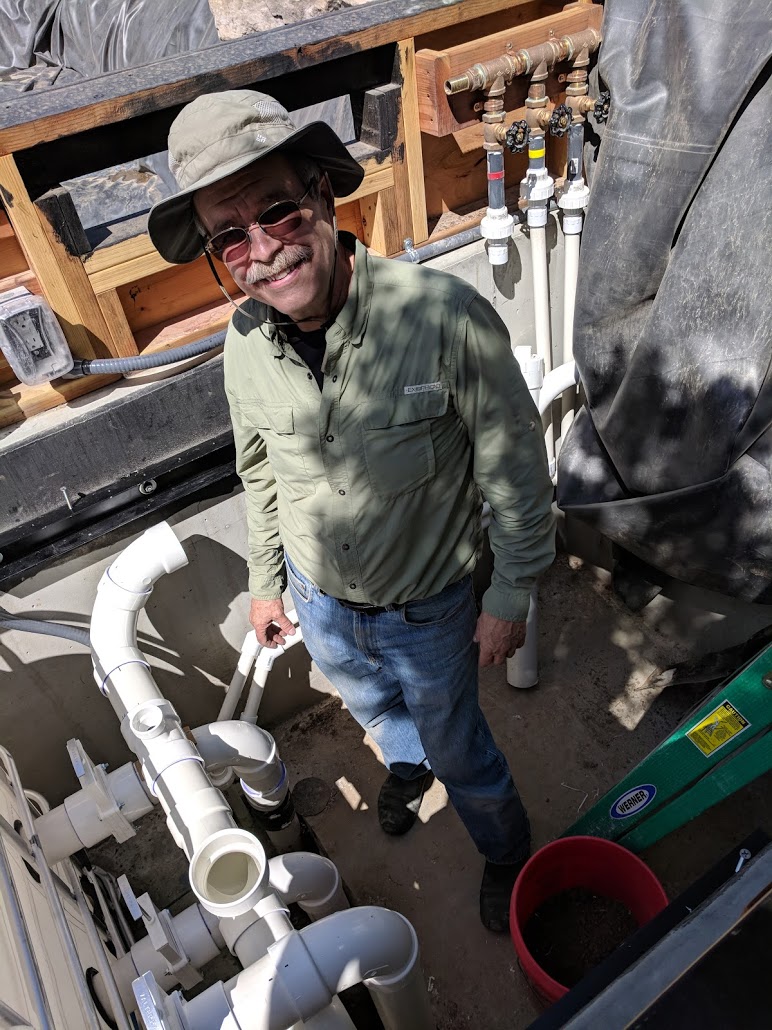
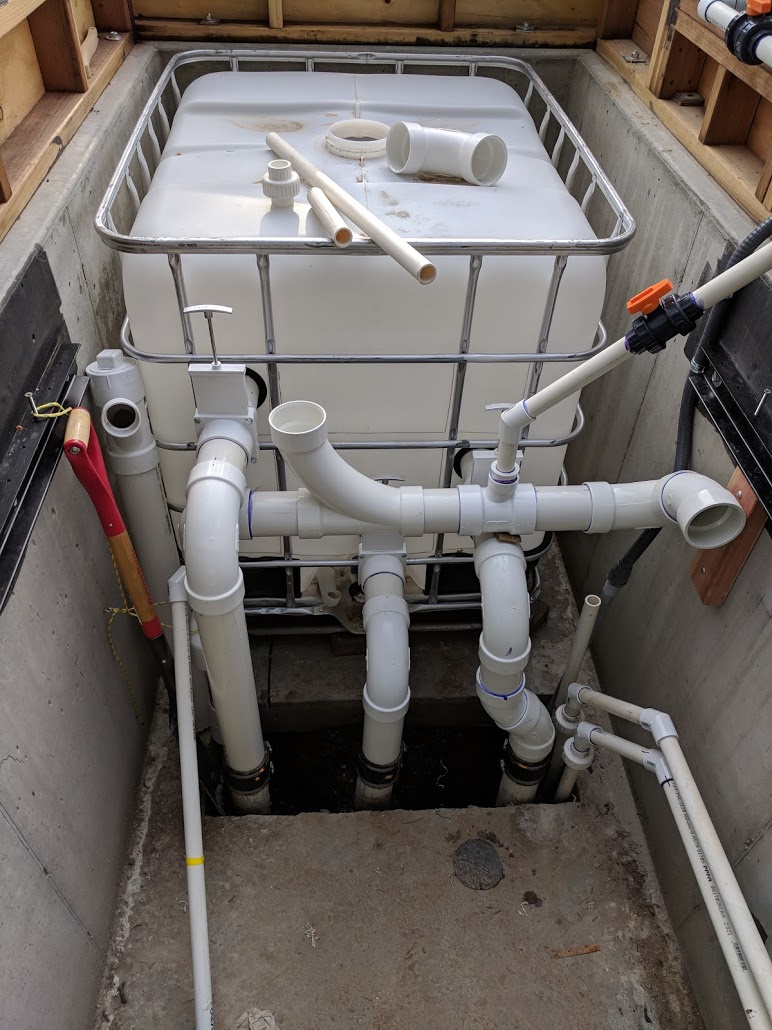
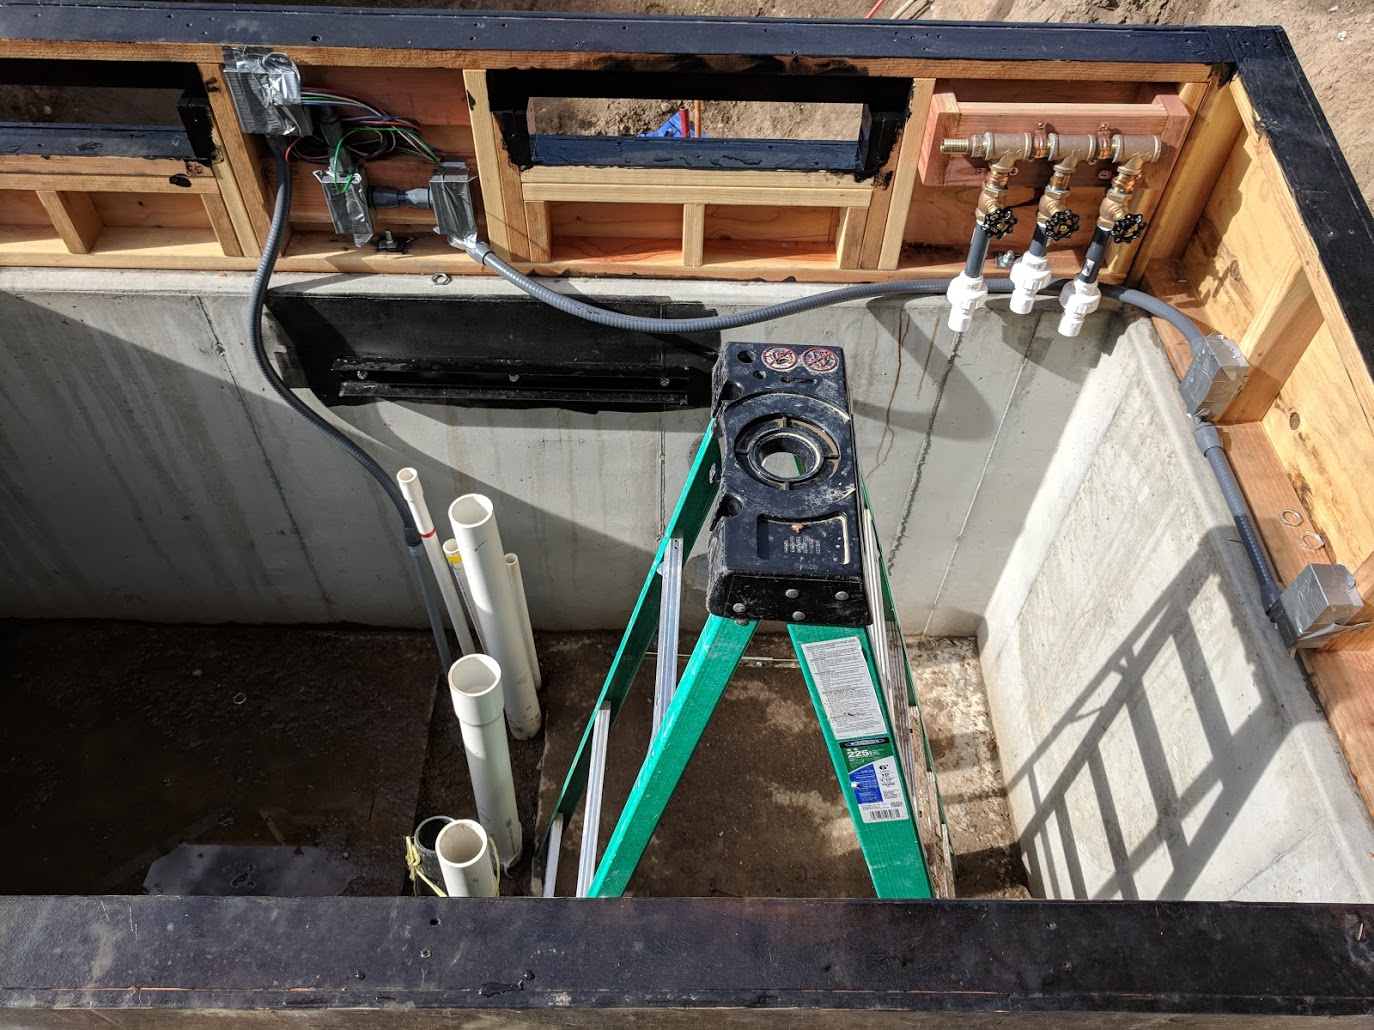
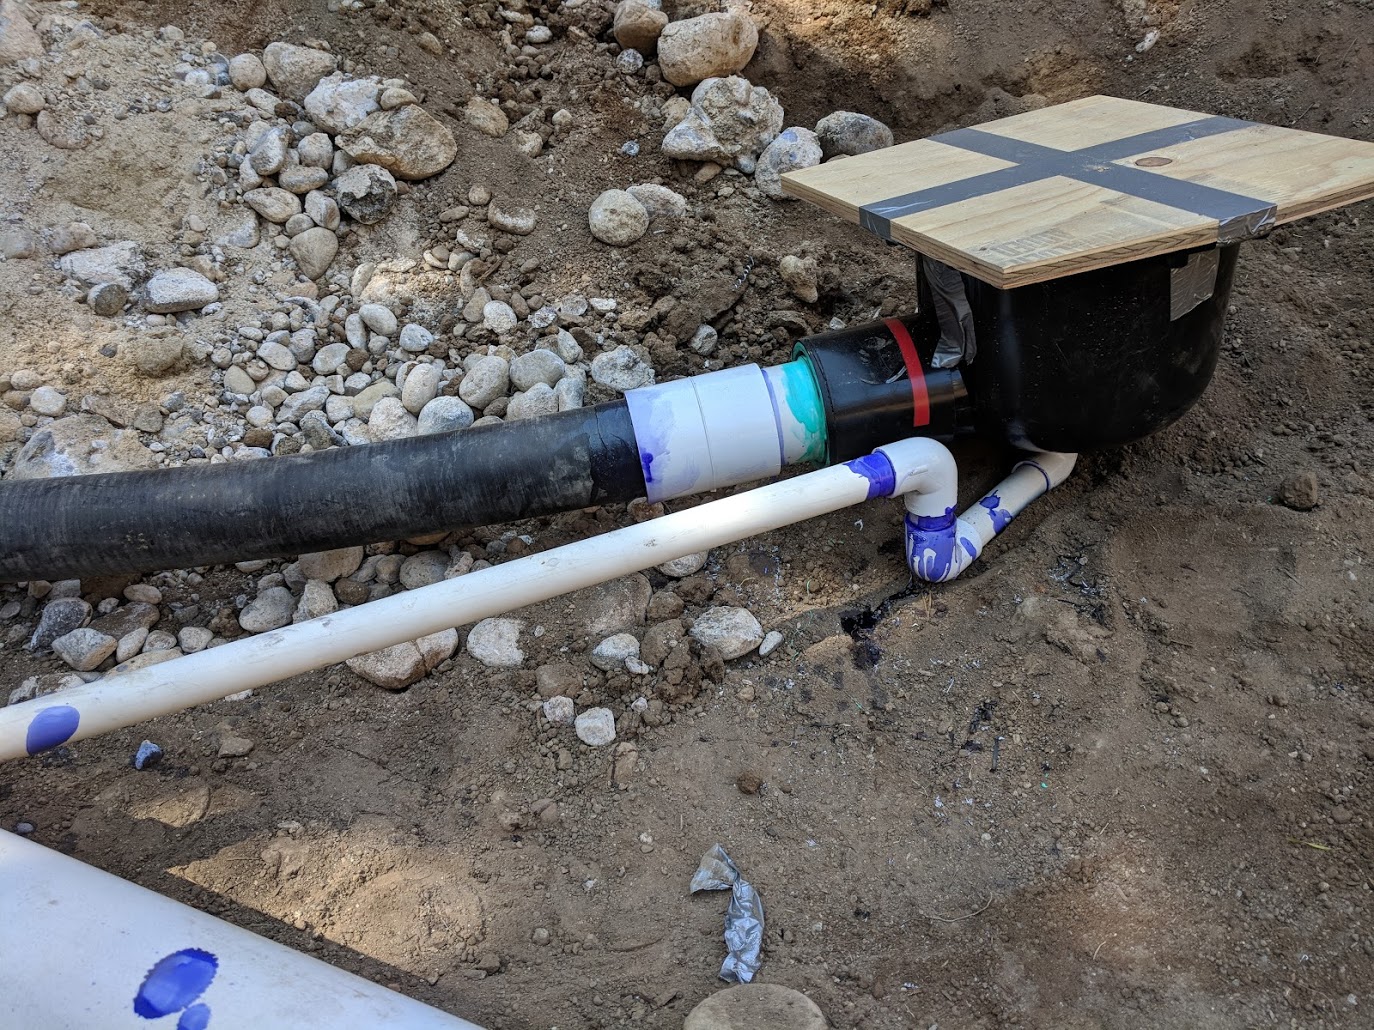
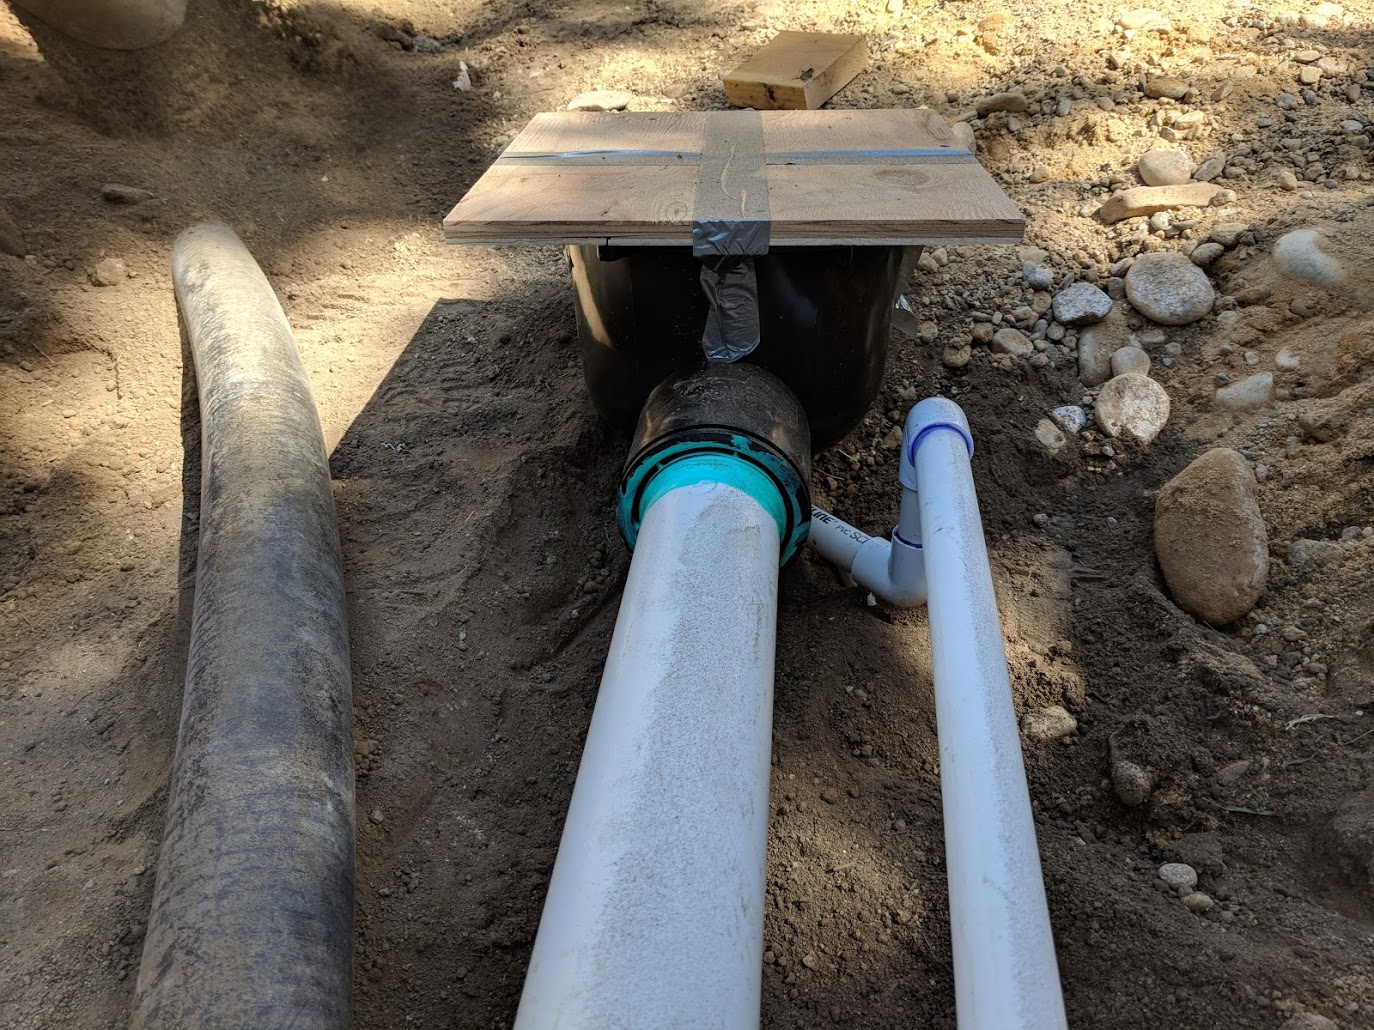
Urban Escapes sent a couple guys back to my house on Friday to help me wrangle the filter into the vault. Rather than keep to the original plan of dropping the filter straight into the vault, I decided to have them help me empty the filter’s media into a water tank for inspection. This spring the filter clogged up and I had to remove the valve assembly and use a heavy wood stick to break the media up. It took a week of back flushing and stick stirring to get the media moving again. I wasn’t 100% sure all the media was free, however, and this was going to be my only chance to check. Fortunately all the media was free flowing and not clumped so we were OK to continue. The disassembled filter was a lot easier to move around so the Urban Escapes crew left, and Molly and I poured the media back into the filter (now in the vault). I spent Friday afternoon plumbing, trying to make as much headway as possible. I ended the day with filter 99% plumbed in but the filter outflow would not line up correctly with the fittings I had. The following morning I made a quick run to the always awesome Grovers and was able to finish plumbing the filter by 9:30 a.m. … just in time for the fish move.
We’re getting close now
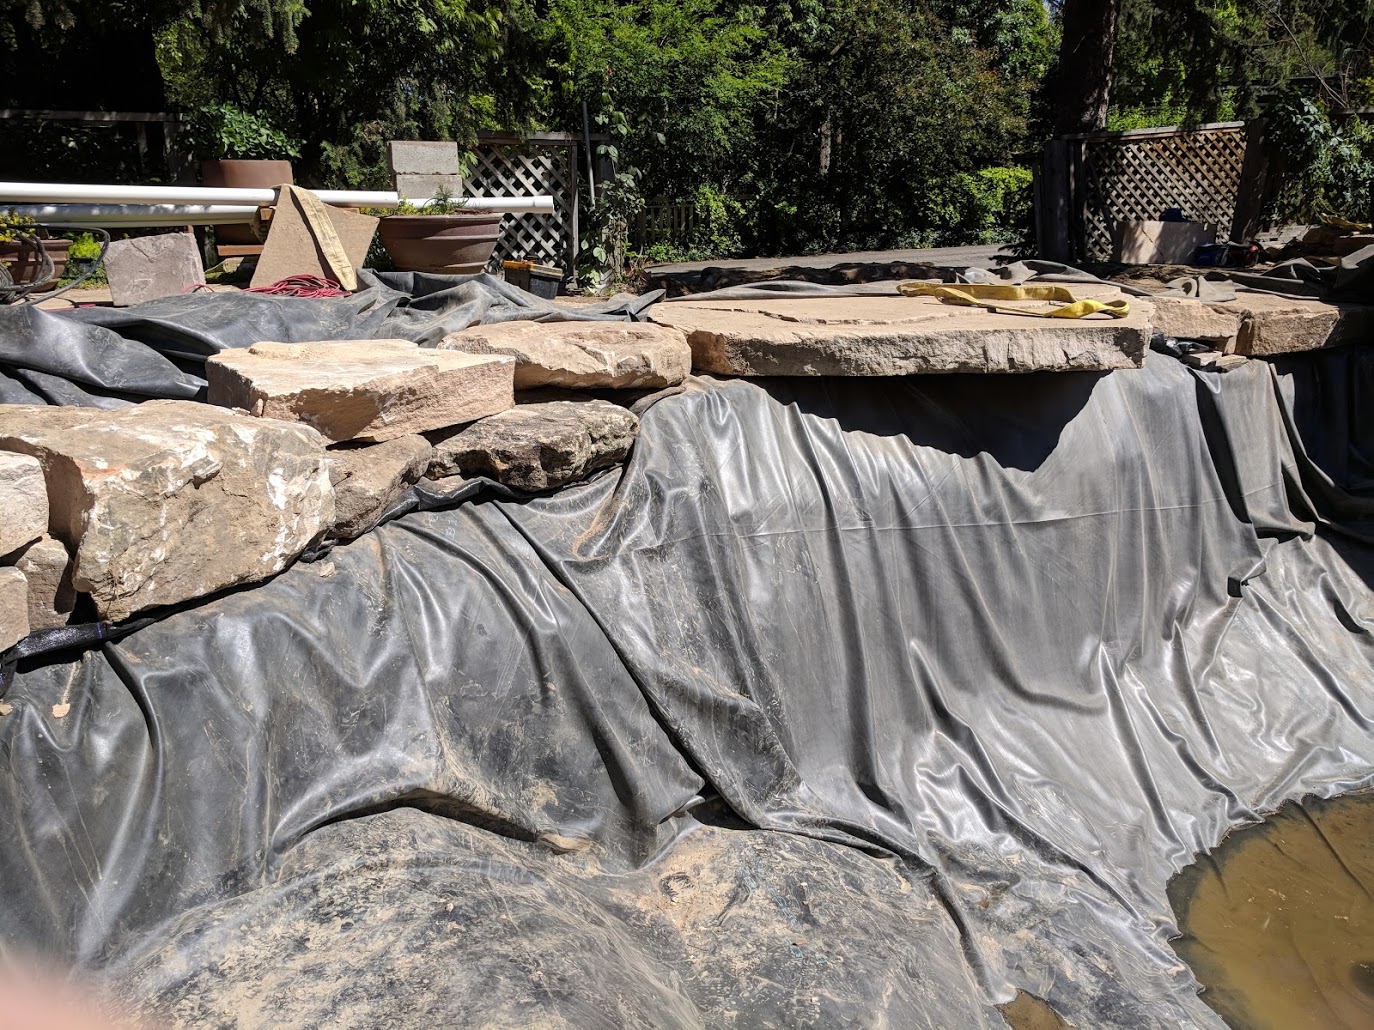
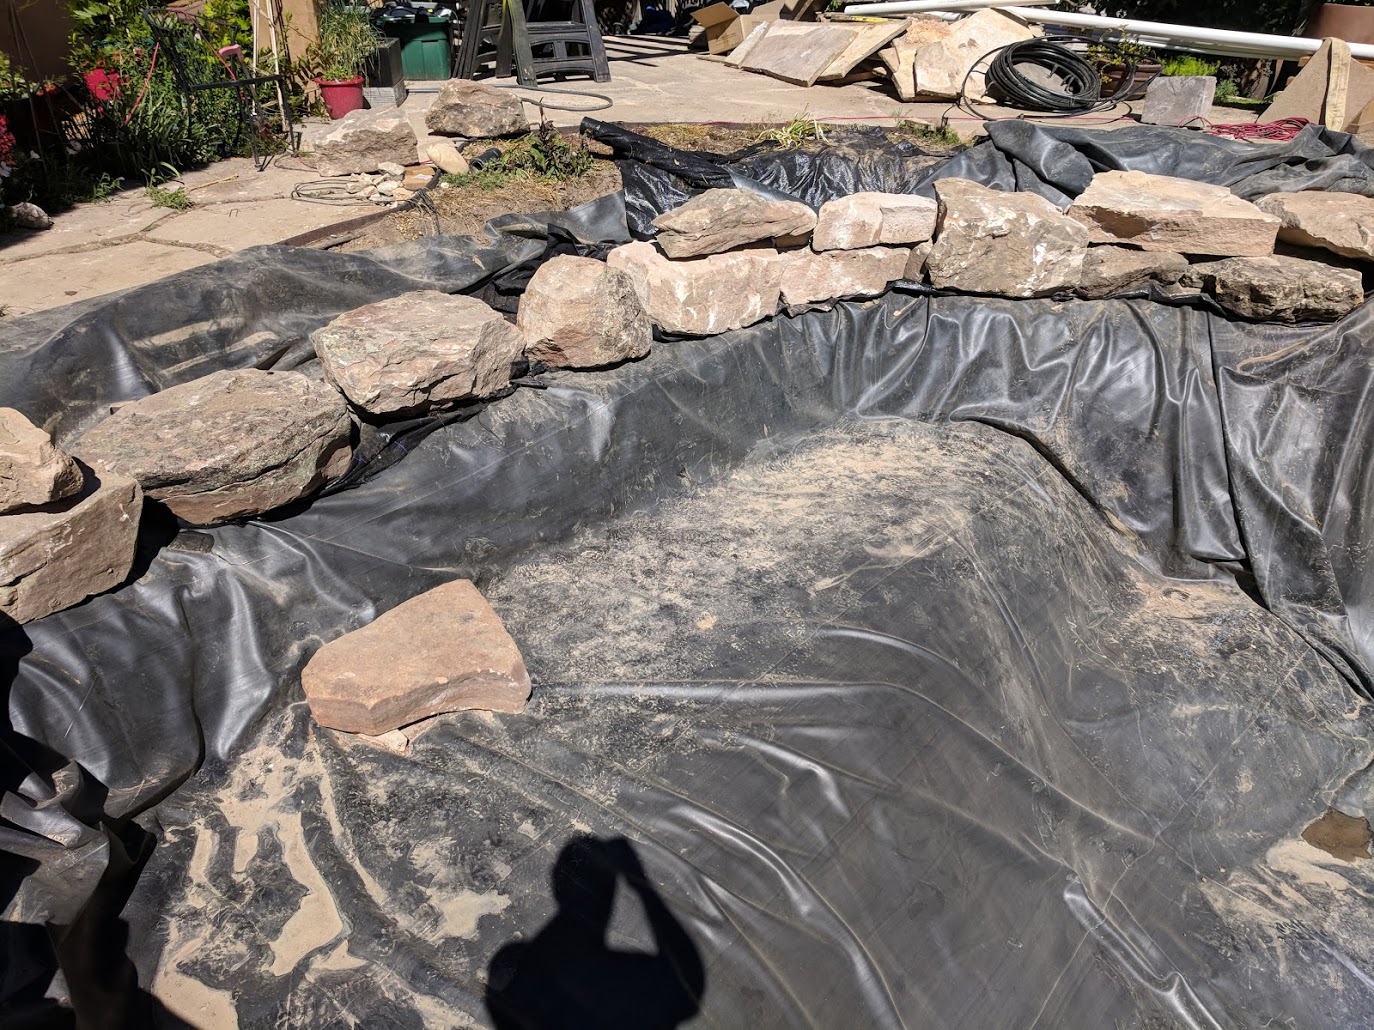
I had to go back to my day job last Thursday, and the Urban Escapes crew started placing rocks around the rim of the pond. When I got home that evening, there some issues with the how the liner was laying in the pond. I stayed home on Friday and we pulled up the rocks and re-adjusted the liner. In a pond of this size you can’t get it perfect but I was satisfied with the results. We got pretty good at patching holes as well; moving big rocks around can be hard on these liners. By the end of the day we were running out of big rocks we could easily manhandle and the crew wrapped up.
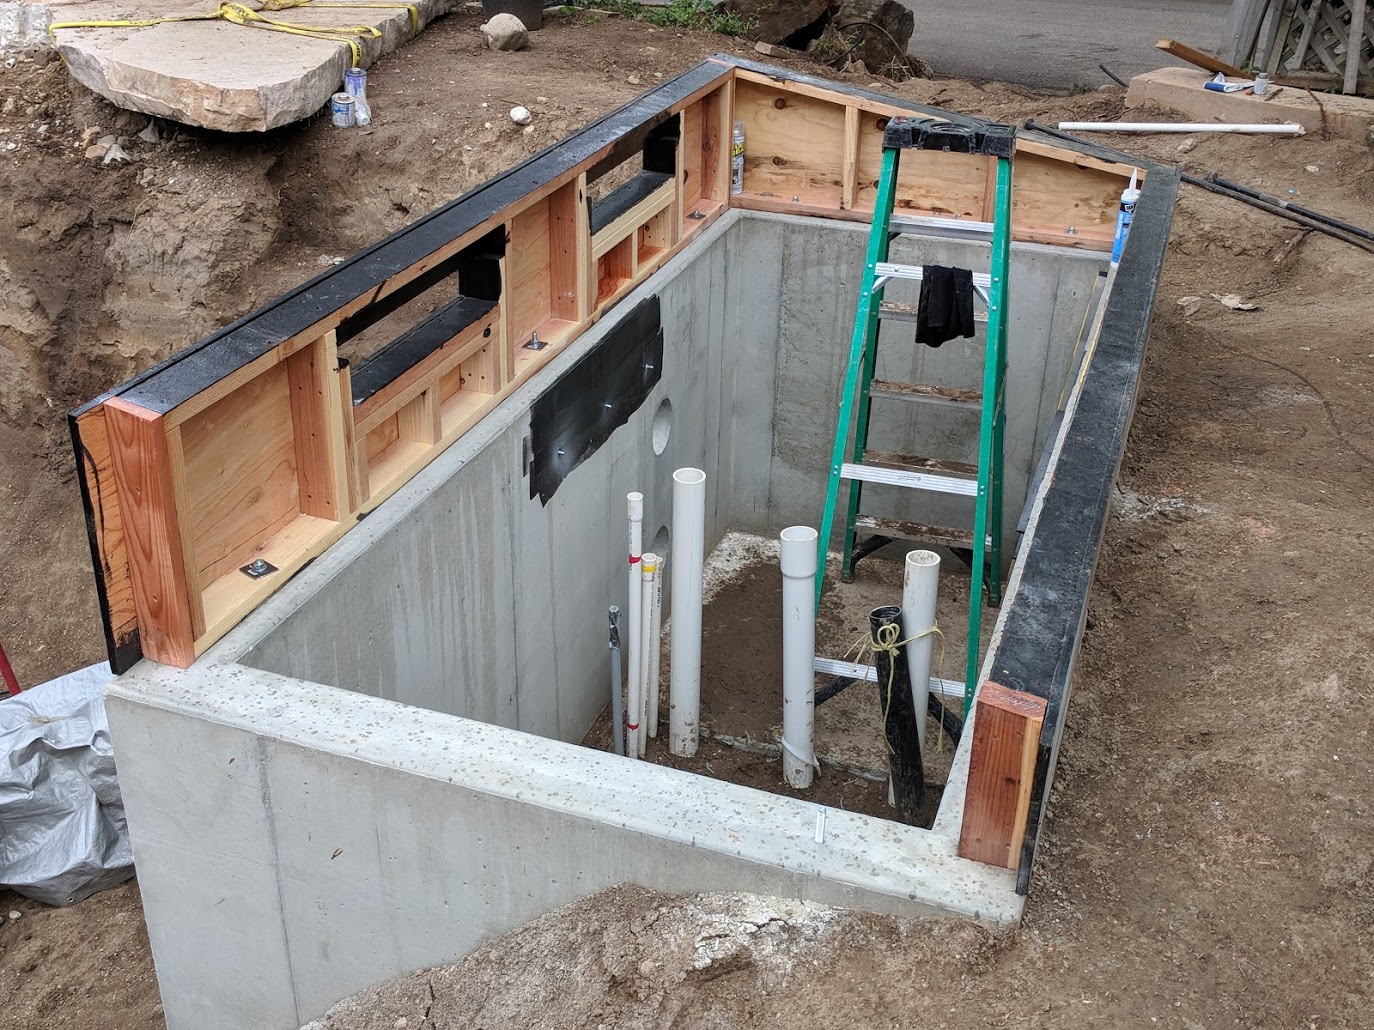
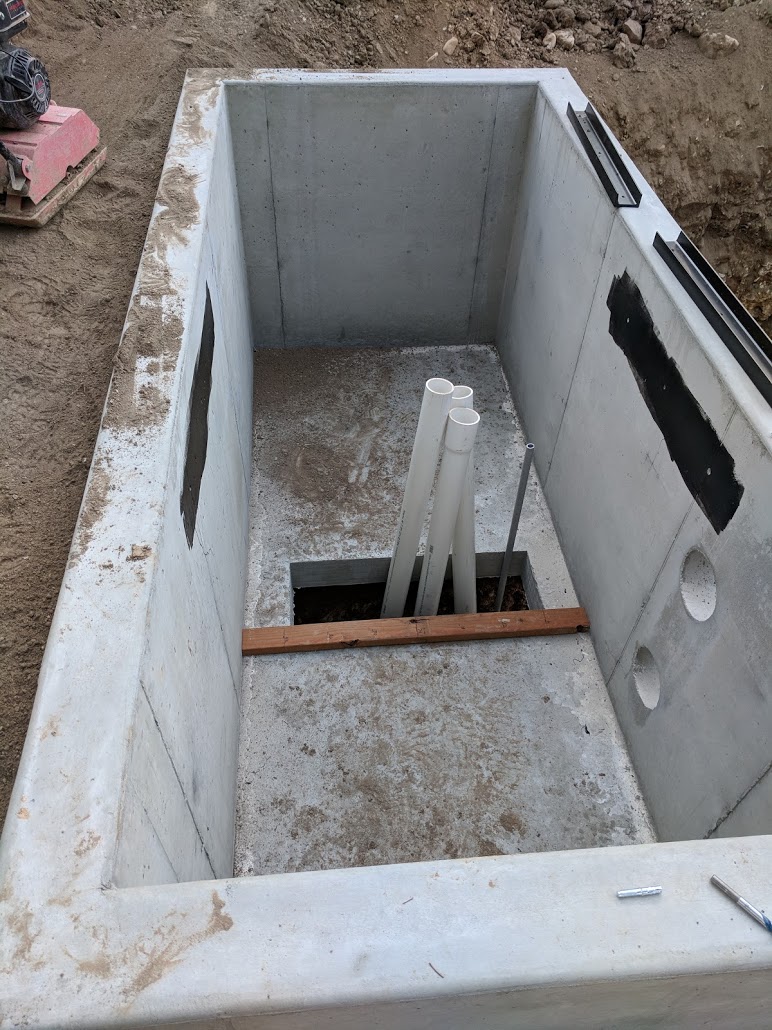
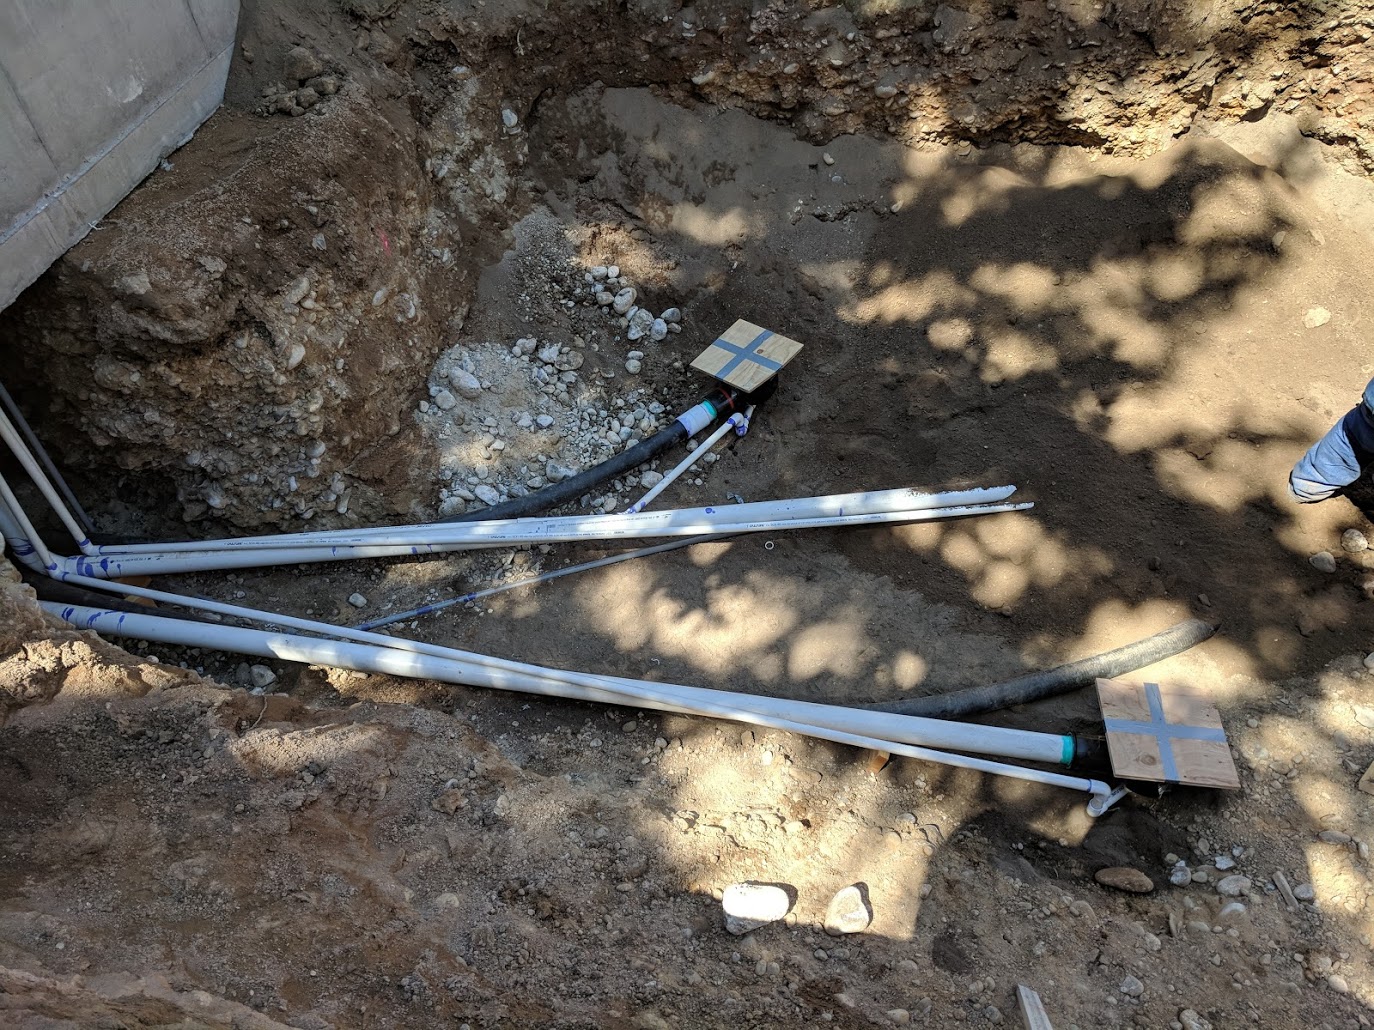
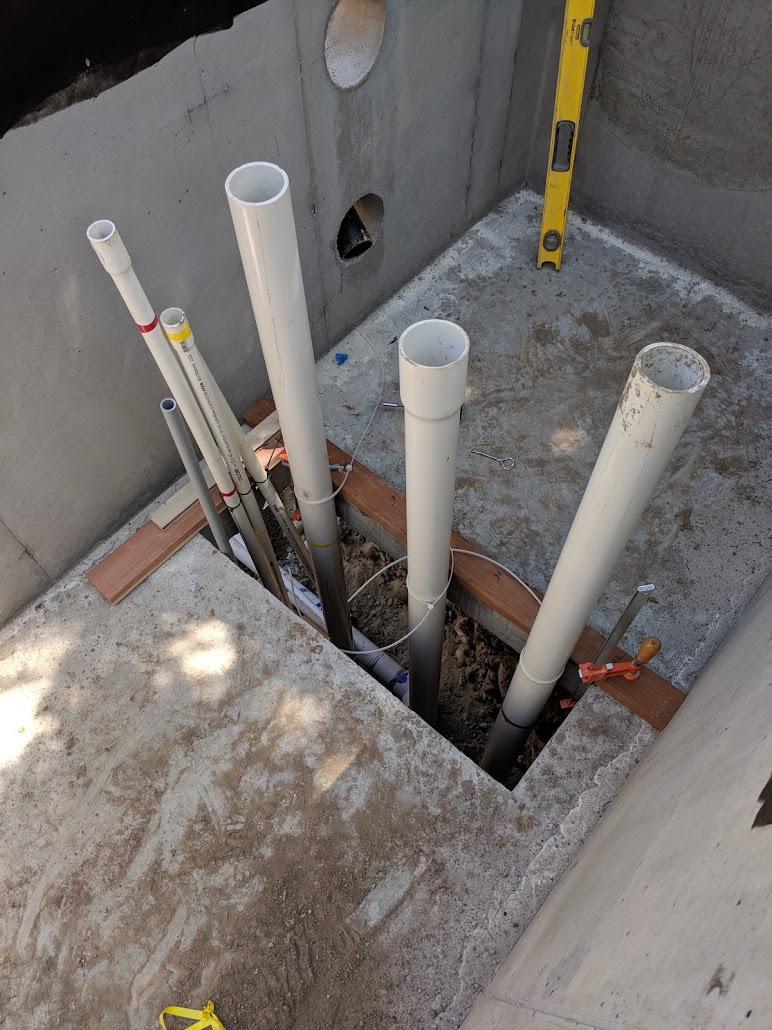
While some folks went on vacation over the Memorial day weekend, my dad and I put on our plumbers’ cracks and started plumbing the vault. This type of plumbing is a lot like figuring out a puzzle. We only have so much space and we have to be efficient about how we use it. By the end of Saturday, we had plumbed in the bottom drains. On Sunday, we began planning how to route the water from the skimmer and completed about 50% of that run. On Monday, my wife and I plumbed the spillways and glued up the first two air lines.


Today (Monday), Lino from Urban Escapes came over in the morning and asked me to take a look at some rocks they have in their yard. We ran out of easily placed boulders on Friday and they were hoping they had a good match among the extras from other jobs. And boy were they a good match- I can’t really tell the difference between the two types of rock. I went off to work. When I got home today, the pond was looking fantastic.


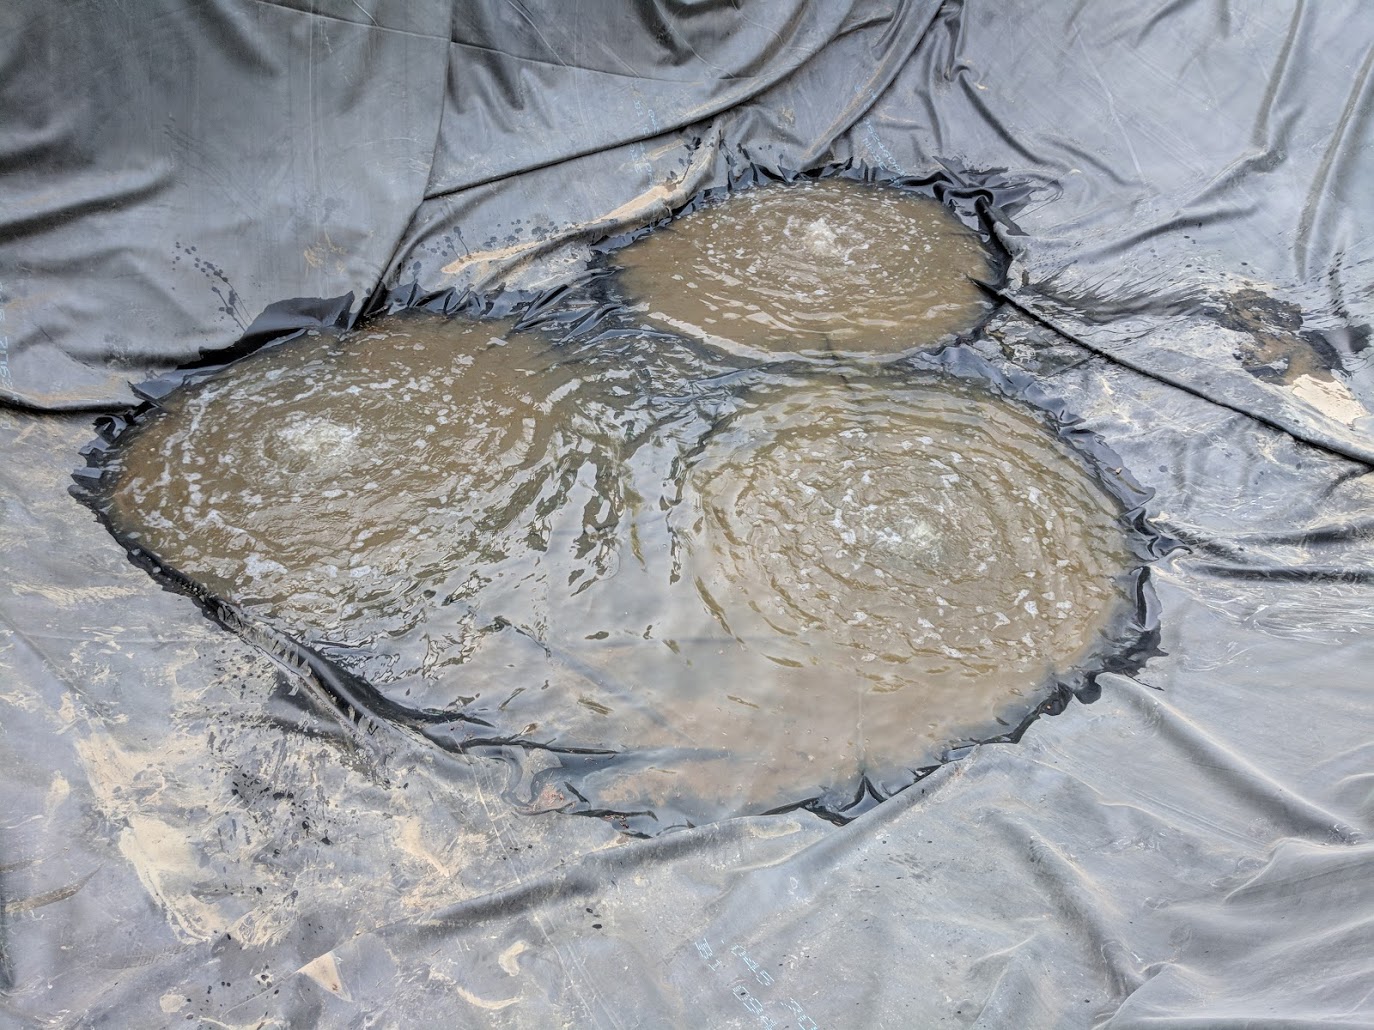
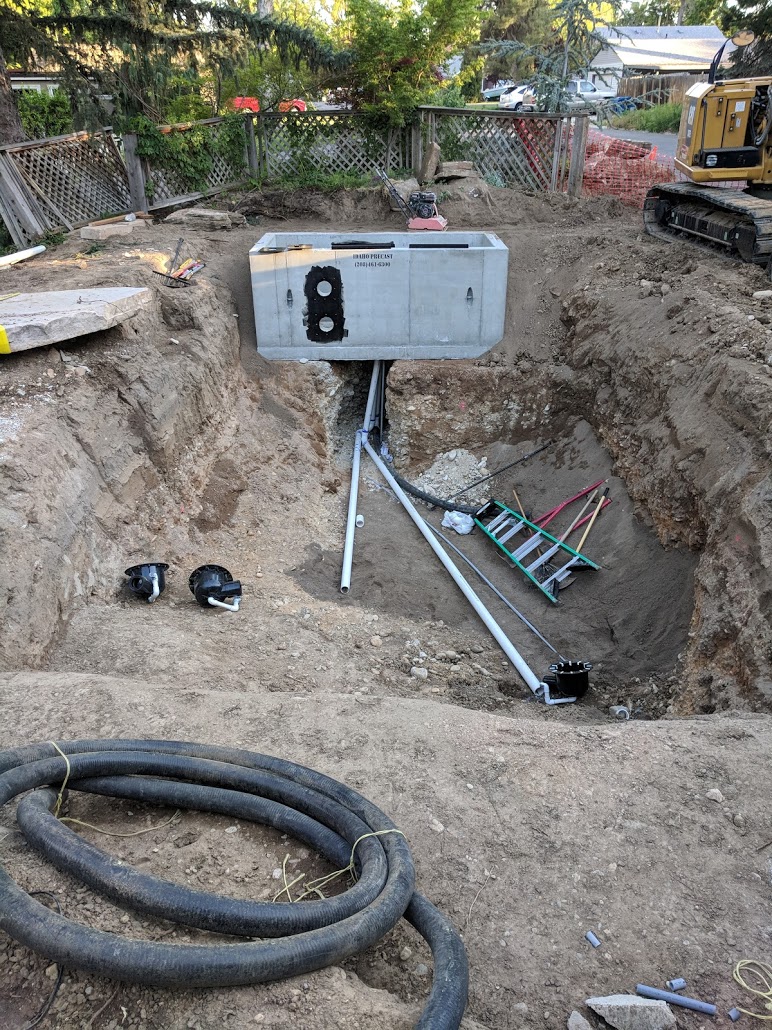
Once the Urban Escapes crew left for the day I ran over to Grovers and picked up the parts I needed finish plumbing the last air line and start plumbing the water return into the pond. This went fairly quickly and I was able to get the last airline finished and start figuring out the drain. Near the end of the day I decided to hook up the Matala/Hakko 120L air pump and see if the airlines were in good shape. I let Molly flip the switch for the first time and our pond took its first breath.
Tomorrow the crew will finish placing rocks so they can return the trackhoe and repair the irrigation lines they had to dig up and cut. When I get home from work tomorrow I will continue to plumb the vault. It feels like we’re finally in the final stretch and we’re planning to have the fish back in the pond next weekend.
The pond will hold water now.
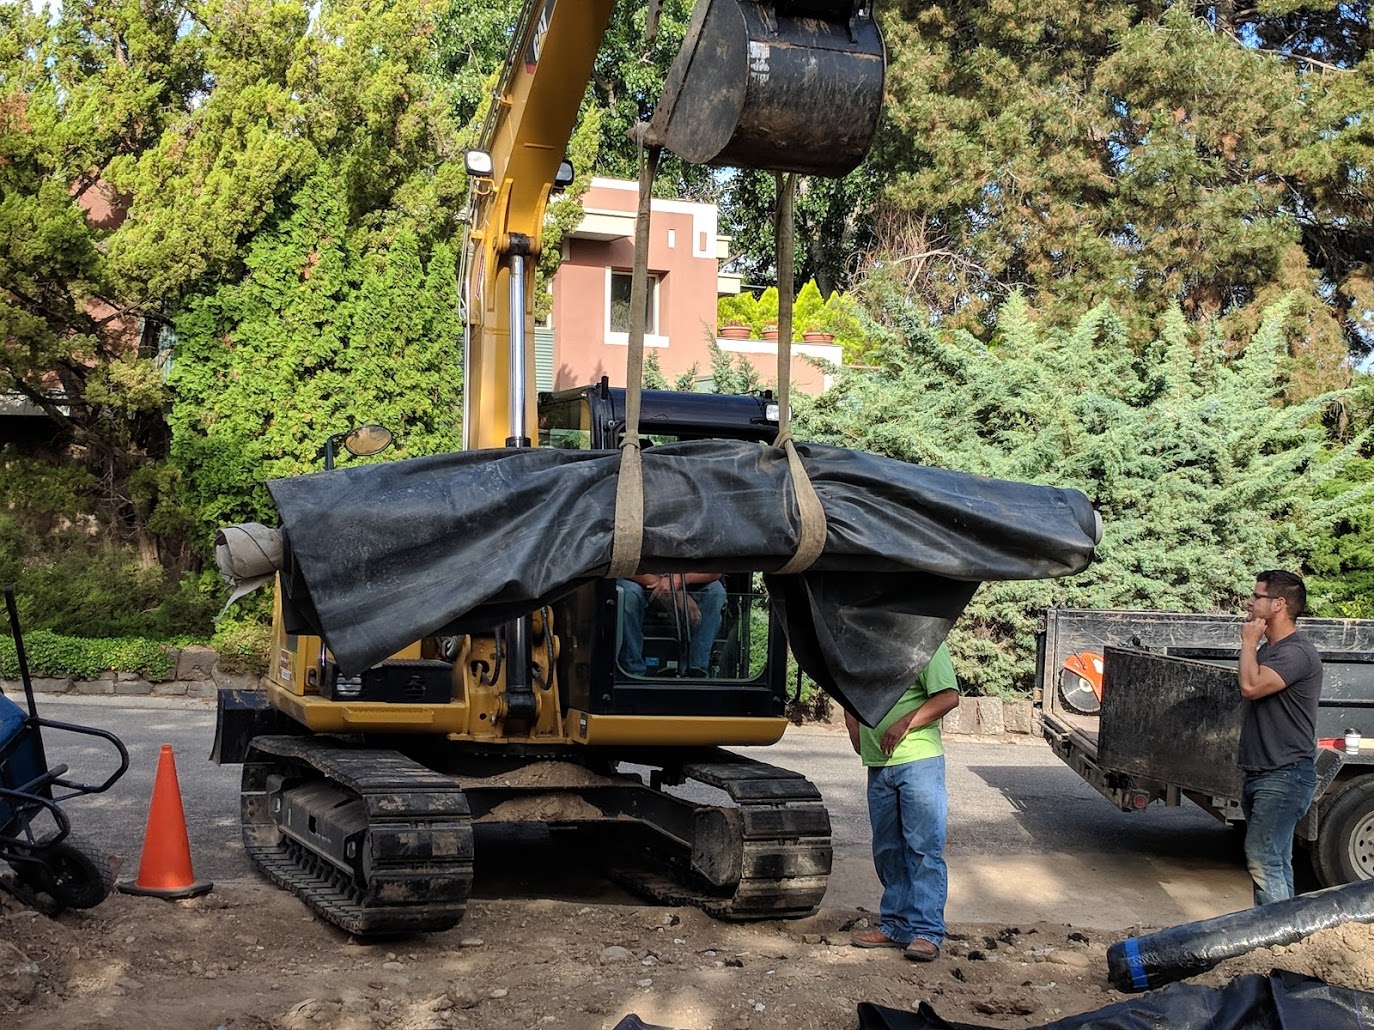
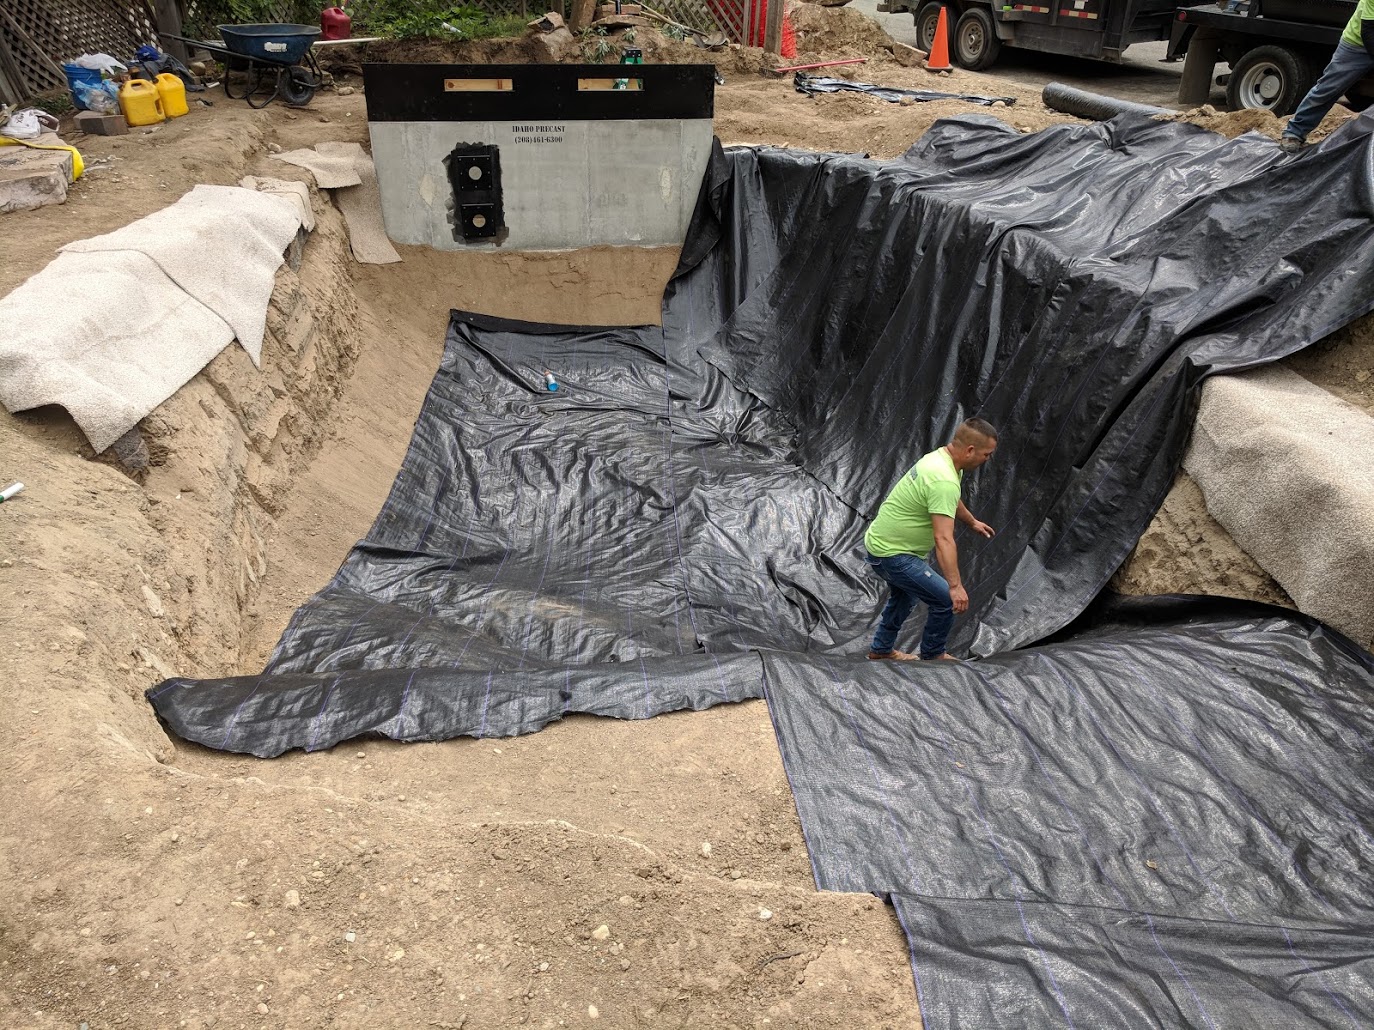
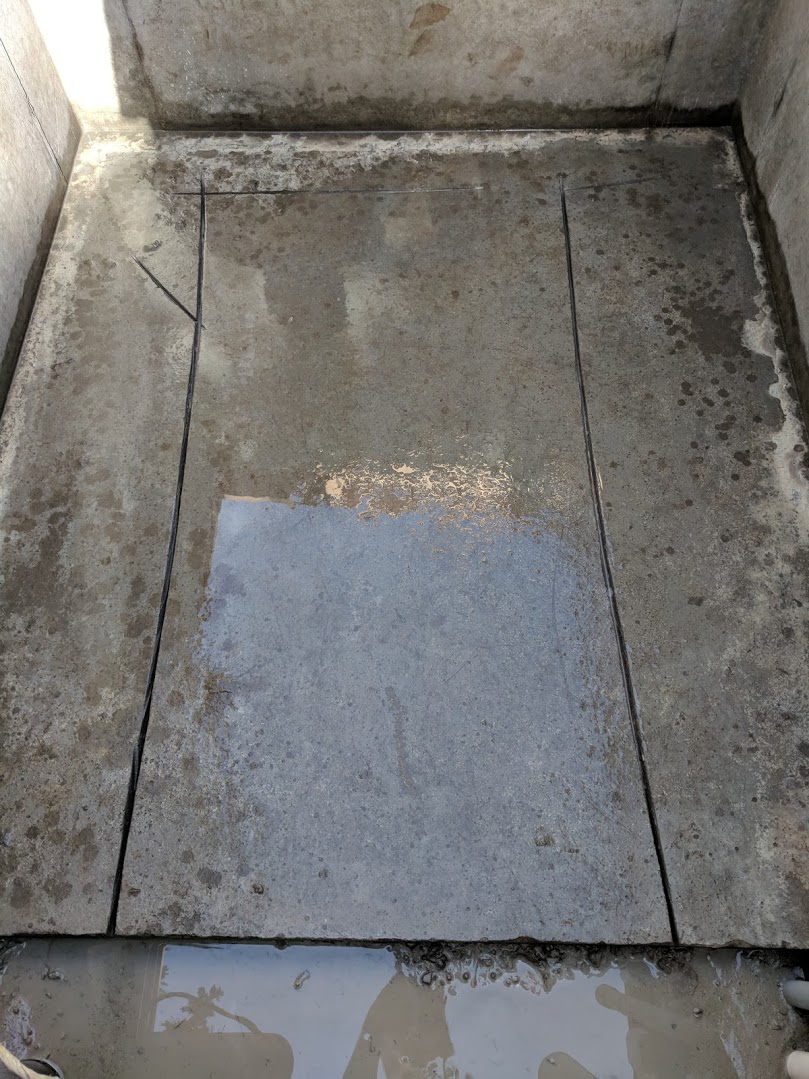 Wednesday was a big day. First thing in the morning, we unloaded the liner and unrolled it. A 50 foot by 40 foot liner like this weighs over 600 lbs! Once the liner was unrolled, we had some last minute prep left. The Urban Escapes crew rented a 14″ concrete saw and cut some shallow channels in the floor of the vault. When the vault was installed it was level, but on Wednesday the level bubble hugged one side of its marks. Water pooled on one side of the vault so extra drainage was necessary.
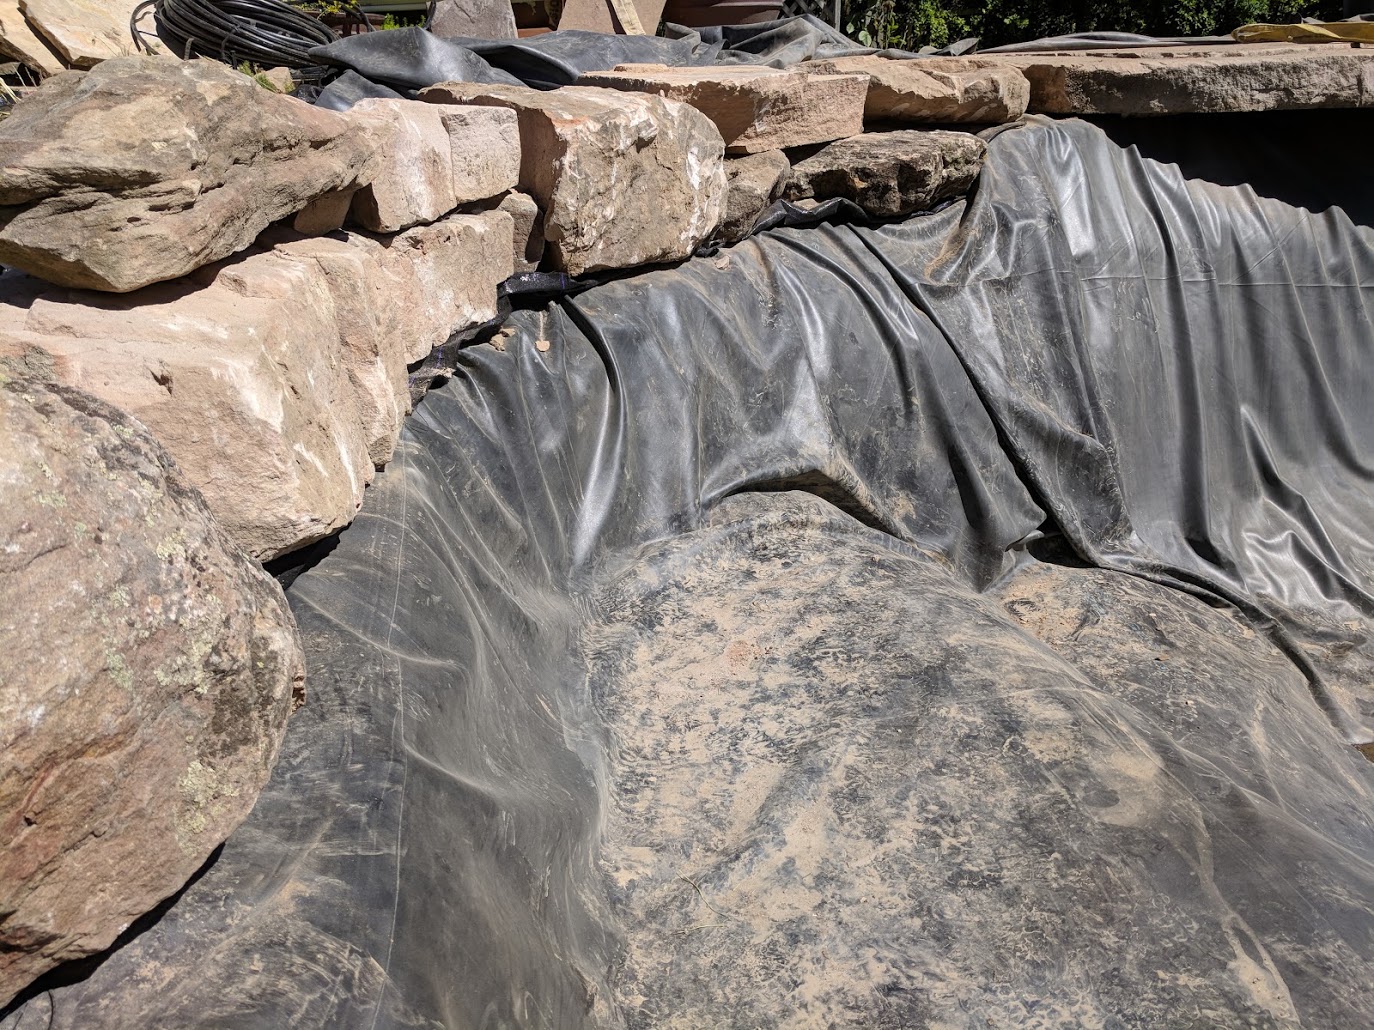
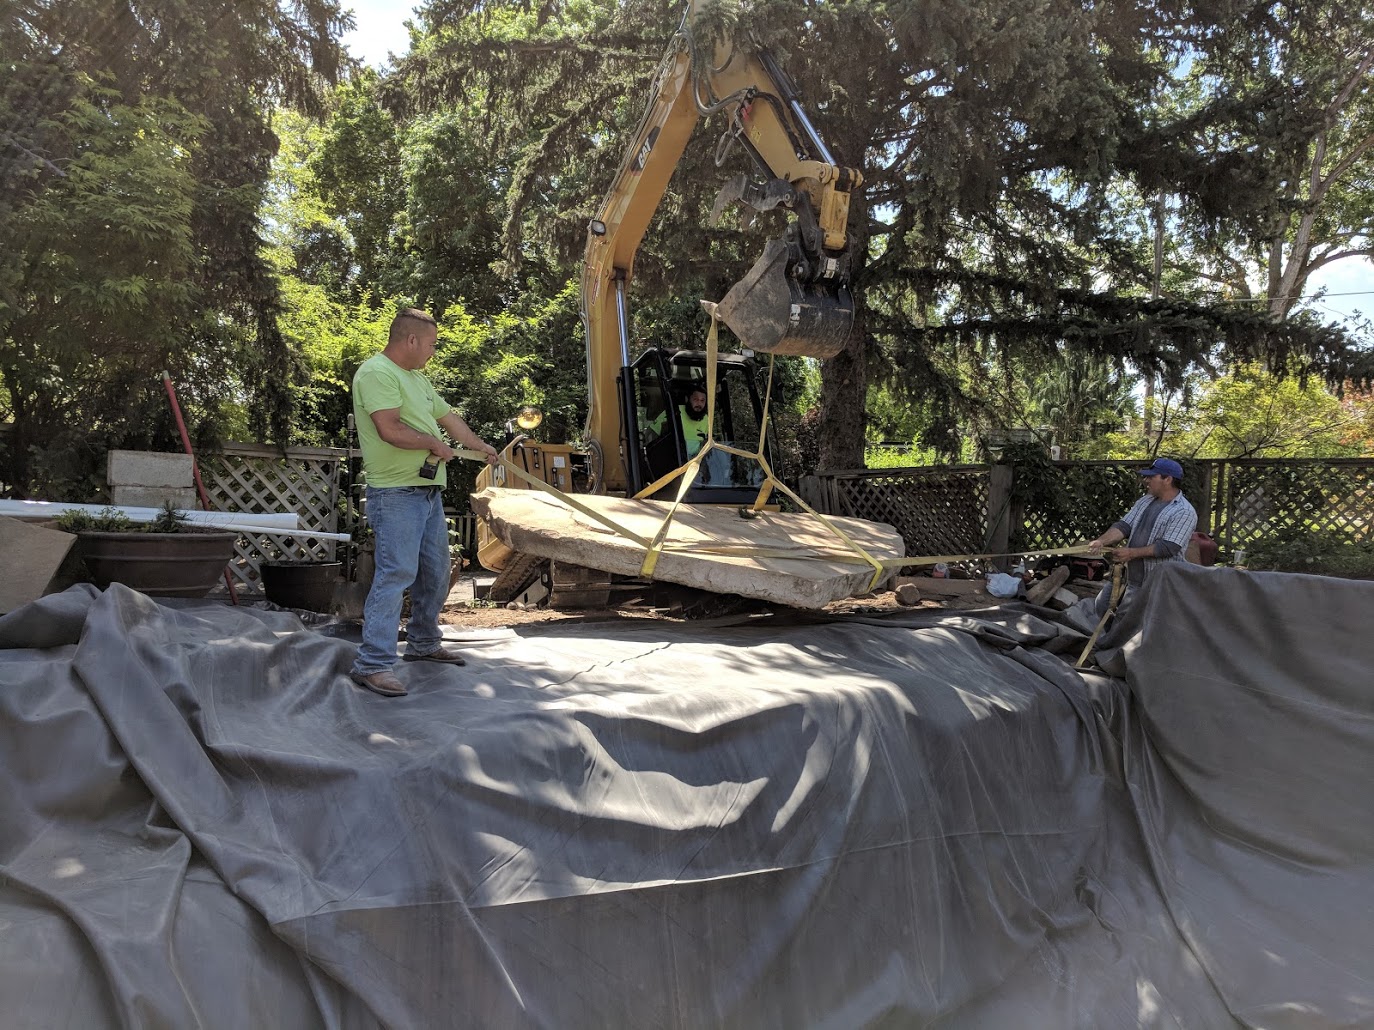
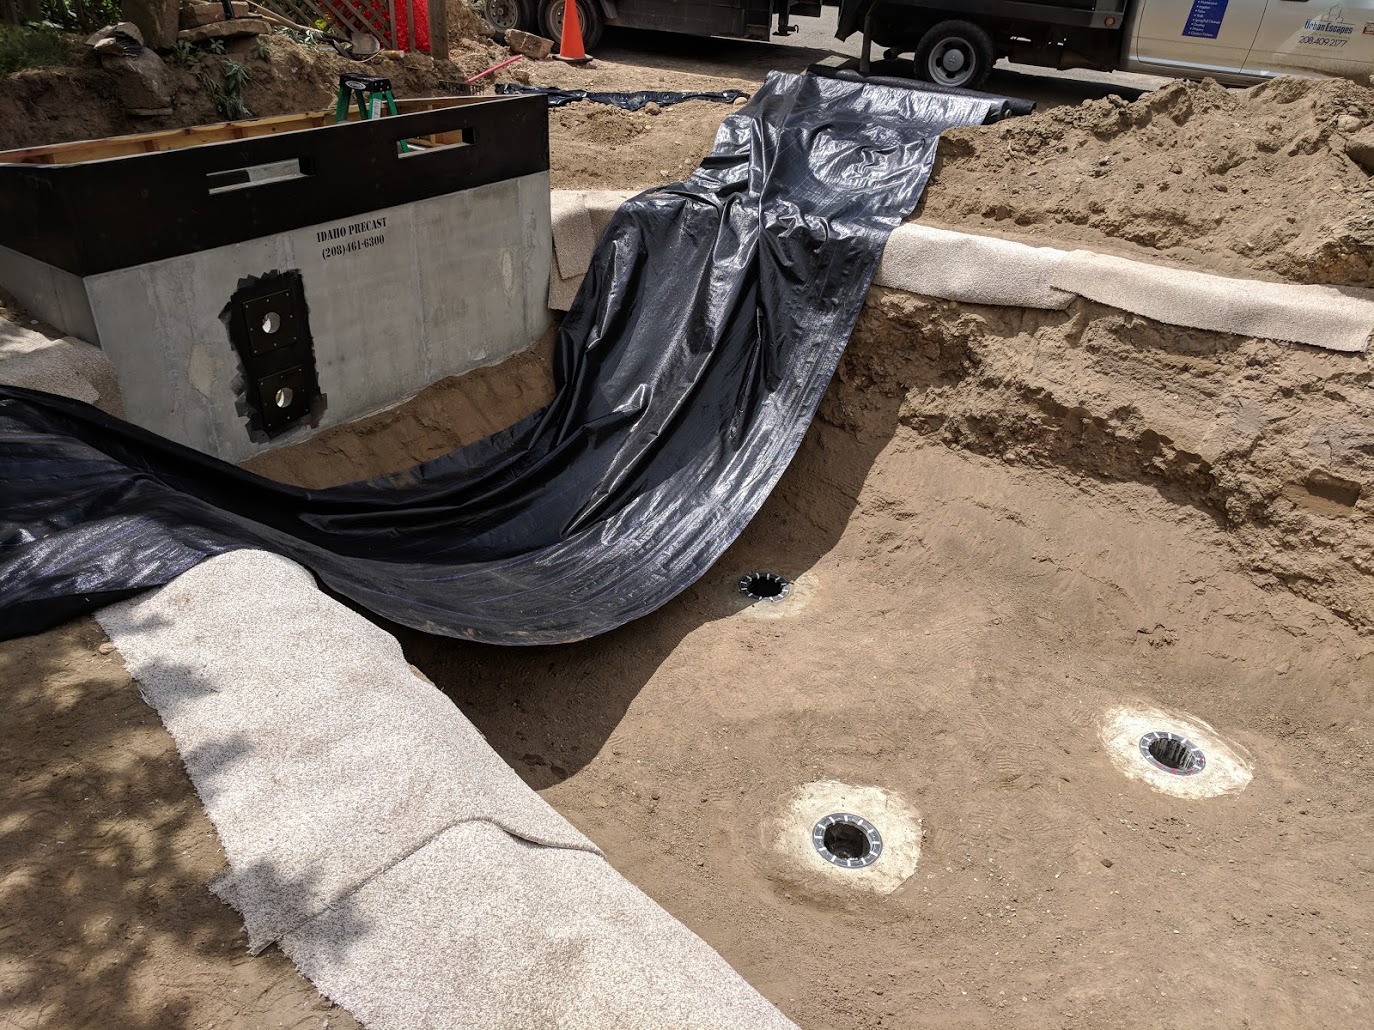
The first step was to get the liner positioned in the pond. The four Urban Escapes workers were able to stand the roll up on its side against the pond wall and we slowly unrolled it along that wall. Once it was off the cardboard roll, we used the trackhoe to to pull it up over the edge of the vault and started to unfold it. To anchor one part of the liner, we moved the old waterfall rock into place on the east side of the pond. The rock now cantilevers out over the pond about 18 inches and gives me mild vertigo standing on the edge looking down at the bottom. Cool.
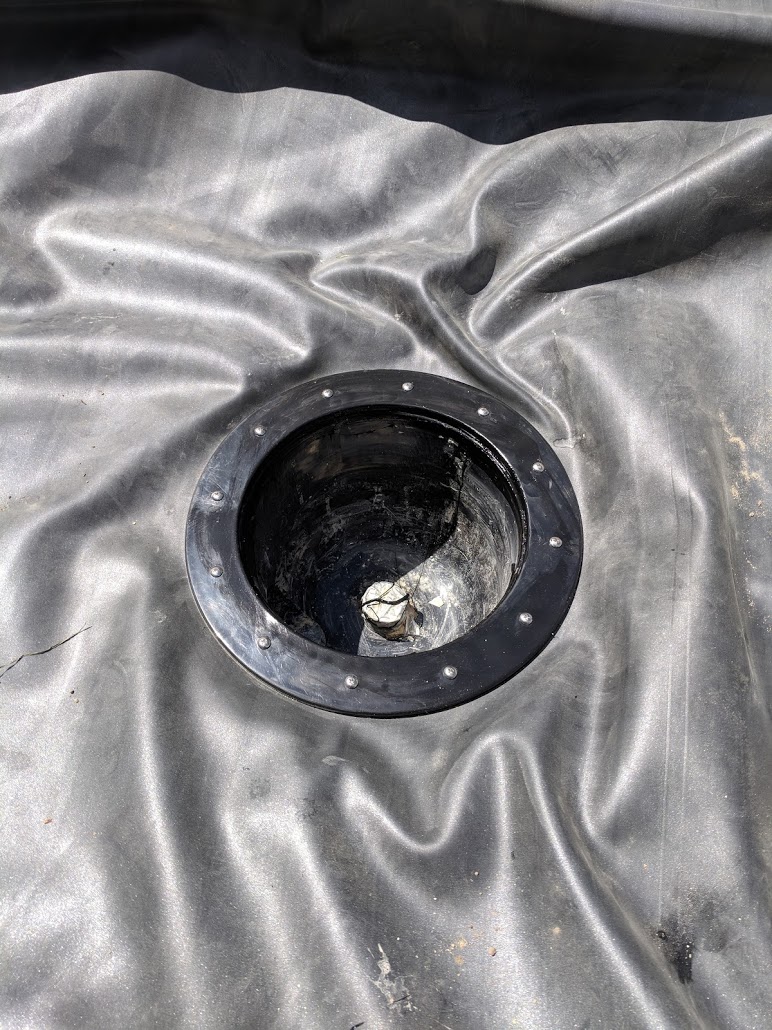
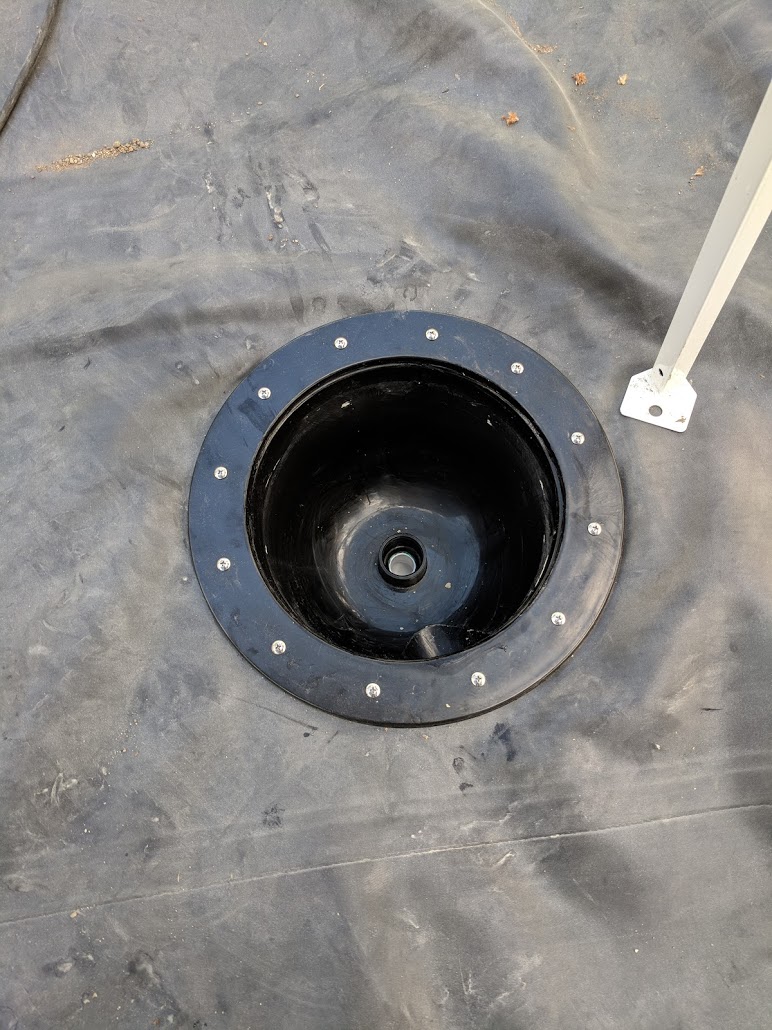
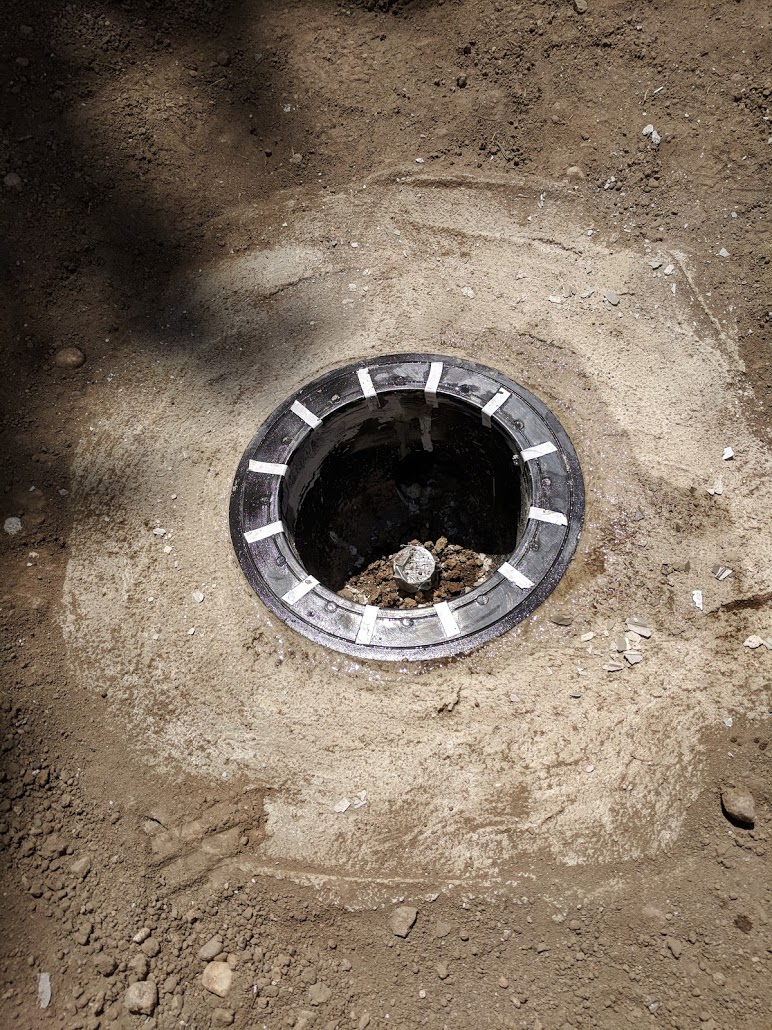
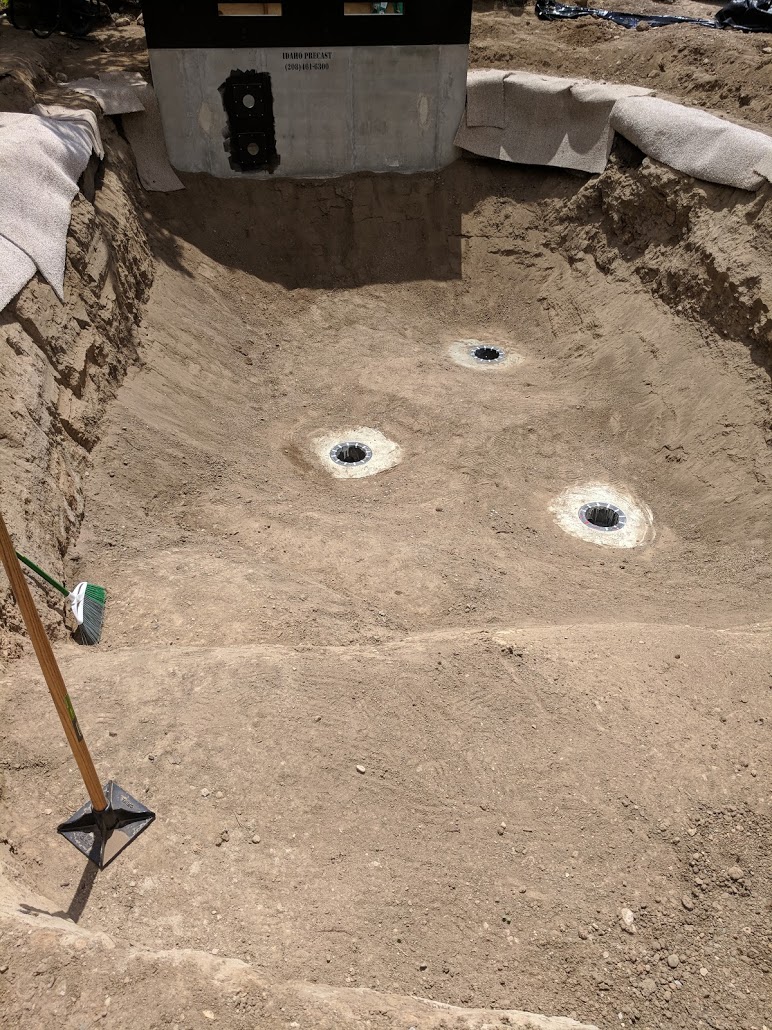
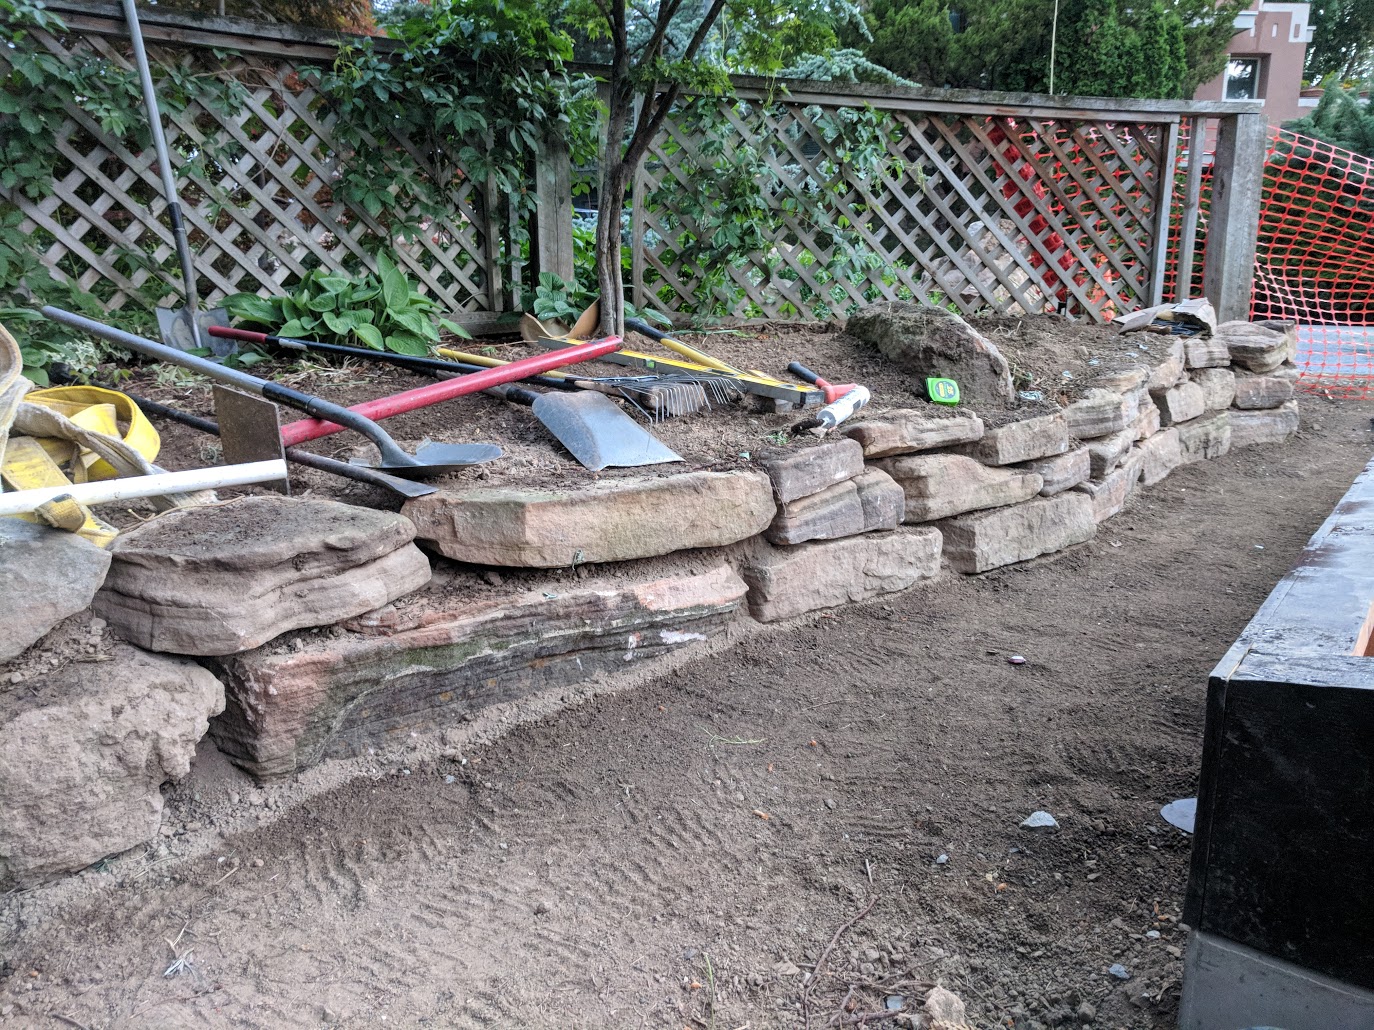 After lunch two of the Urban Escapes crew built a beautiful wall using some of our sandstone rocks. The other two workers and myself attached the three bottom drains to the liner in the bottom of the pond. Once the bottom drains were installed, we used batten bars to attach the liner to the front of the vault. This was a little tricky because the front of the vault has a 45 degree slope in front of it. We ended up standing in the vault on ladders and bending over the front to screw in the stainless steel screws. The crew applied a liberal bead of of 100% silicone caulk between the liner and the vault wall.
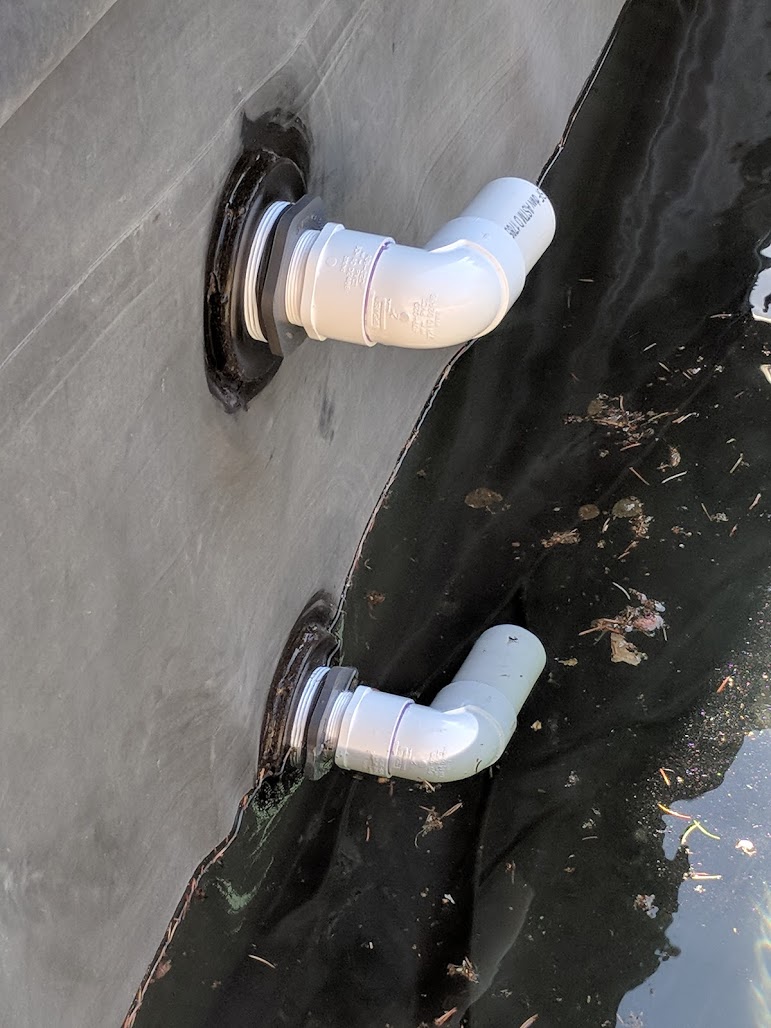
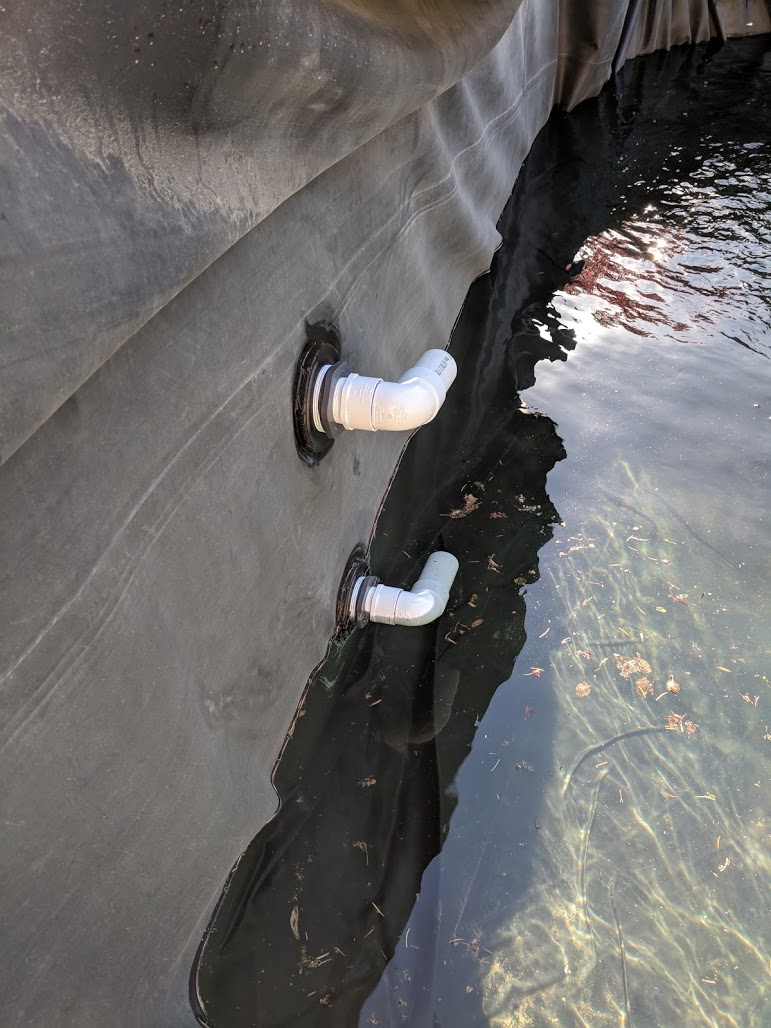
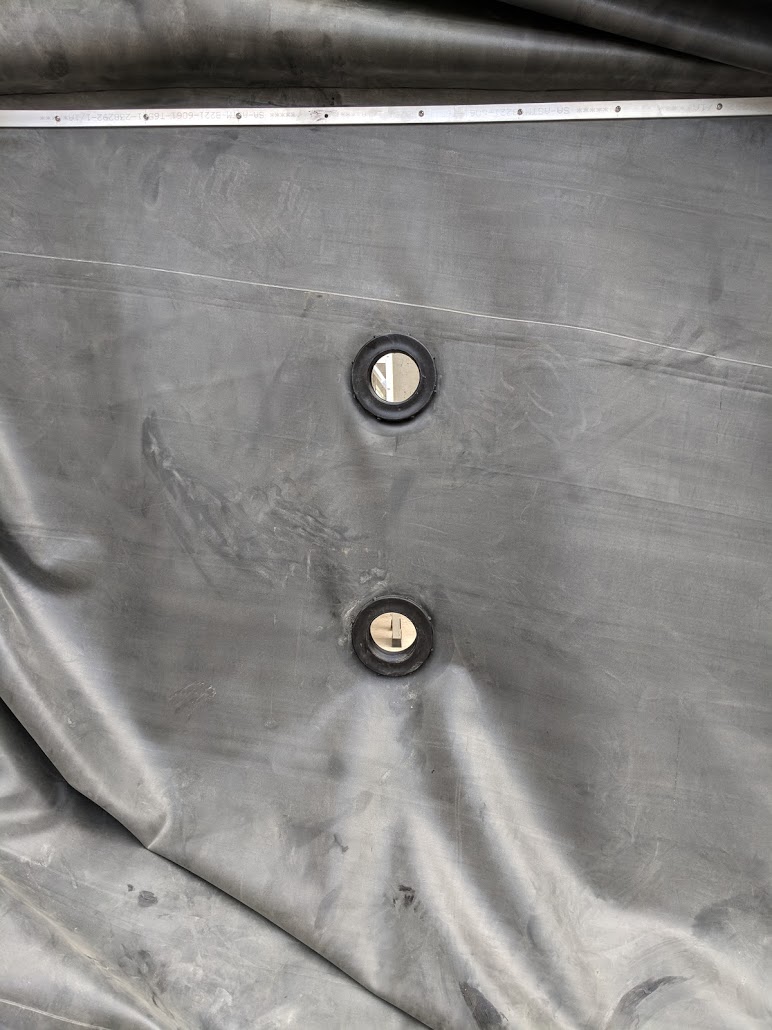
We finished up the day by installing the bulkheads. We used an approach similar to bottom drain installation to make sure everything was water tight. Unfortunately, my fear that the holes in the vault wall were too small was warranted. While the bulkheads fit fine, the holes didn’t leave enough room to for two hands to tighten the bulkhead nuts as much as I would like. I’ll probably apply an extra bead of caulk around the pond side of the bulkheads to help prevent leaks. Overall I am happy with the progress though, and I wish I had a little more vacation to see this through to the end of the week.


Tomorrow the Urban Escapes crew will started placing our sandstone boulders around the pond. We’re so close!
The liner underlayment is in!
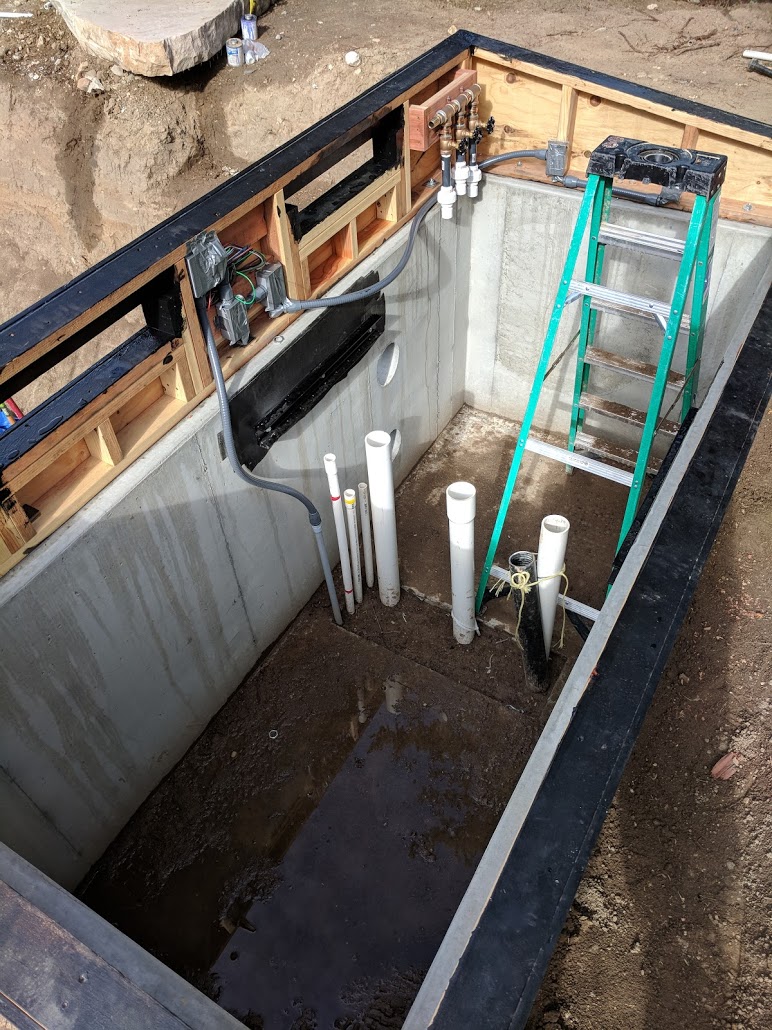
We’re making progress in the beginning of week 3. The electricians finished up wiring Monday morning and left the job site around 11 a.m. The Urban Escapes crew focused on shoring up the walls with concrete block. Unfortunately, I neglected to take photos of the bricks in the pond wall for posterity. The crew was able to get most of the wall complete Monday and only had a small section left Tuesday morning.
Tuesday was productive and we were able to start laying fabric at the end of the day. The original angle of the skimmer was not aimed at the middle of the pond, so we corrected it first thing in the morning. We also stubbed out the plumbing in the original pump housing so we can build up the walls around the housing. After that, Lino and Frankie spent the morning finishing the bricks in the wall. They also installed old carpet to help cushion the liner against the bricks. This was complete by lunch and they moved into on to the final shaping of the bottom of the pond. Frankie and I spent some time cleaning the top of the bottom drains so they would be ready when we attach them to the liner.
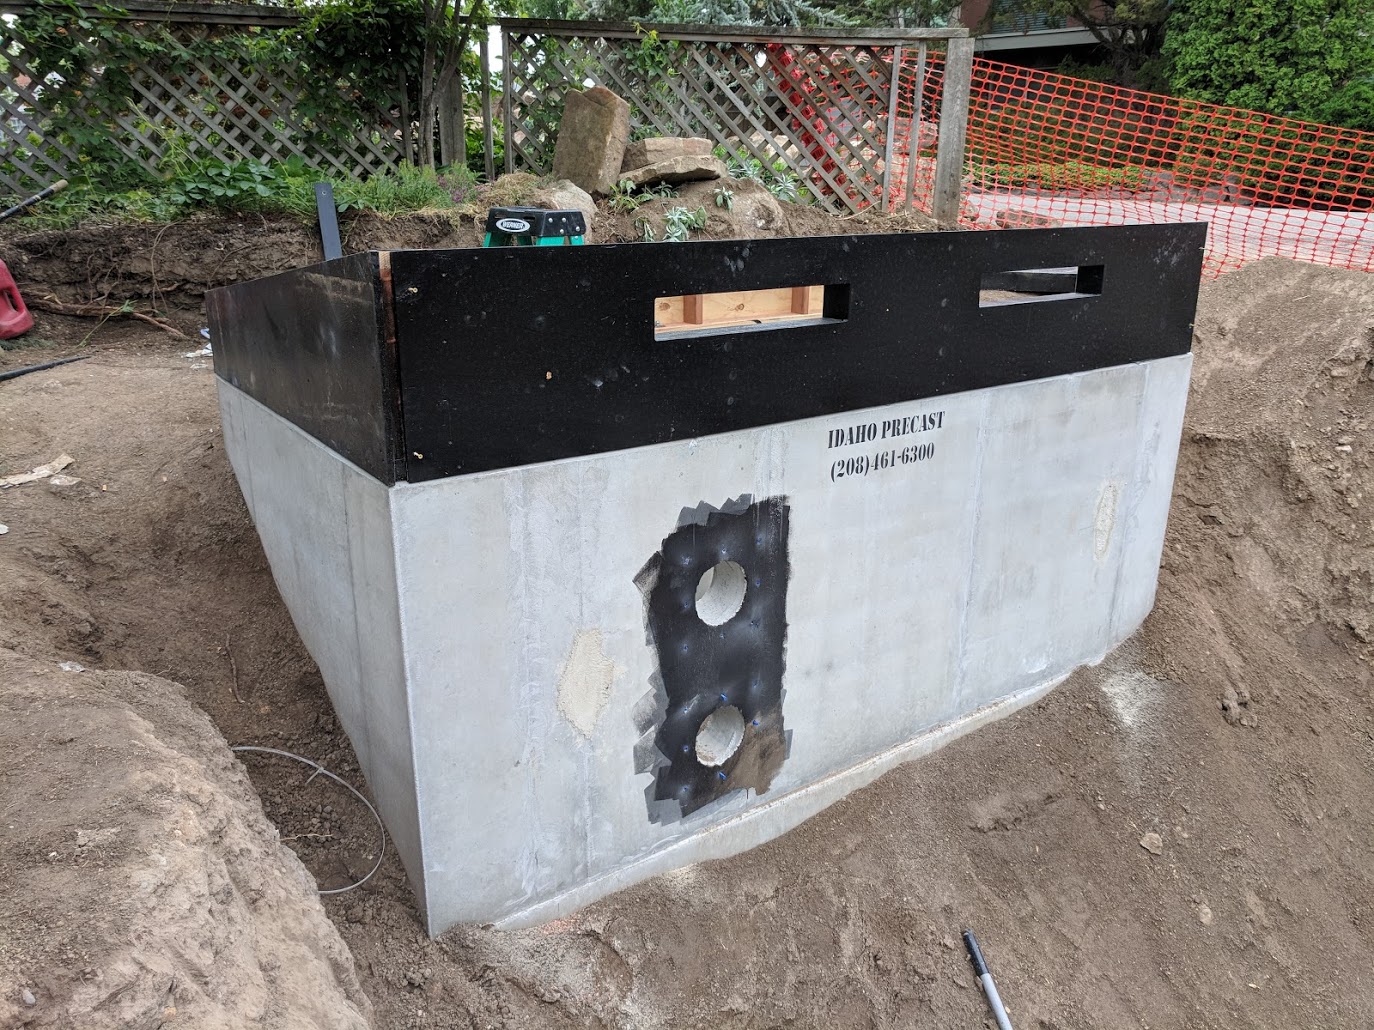
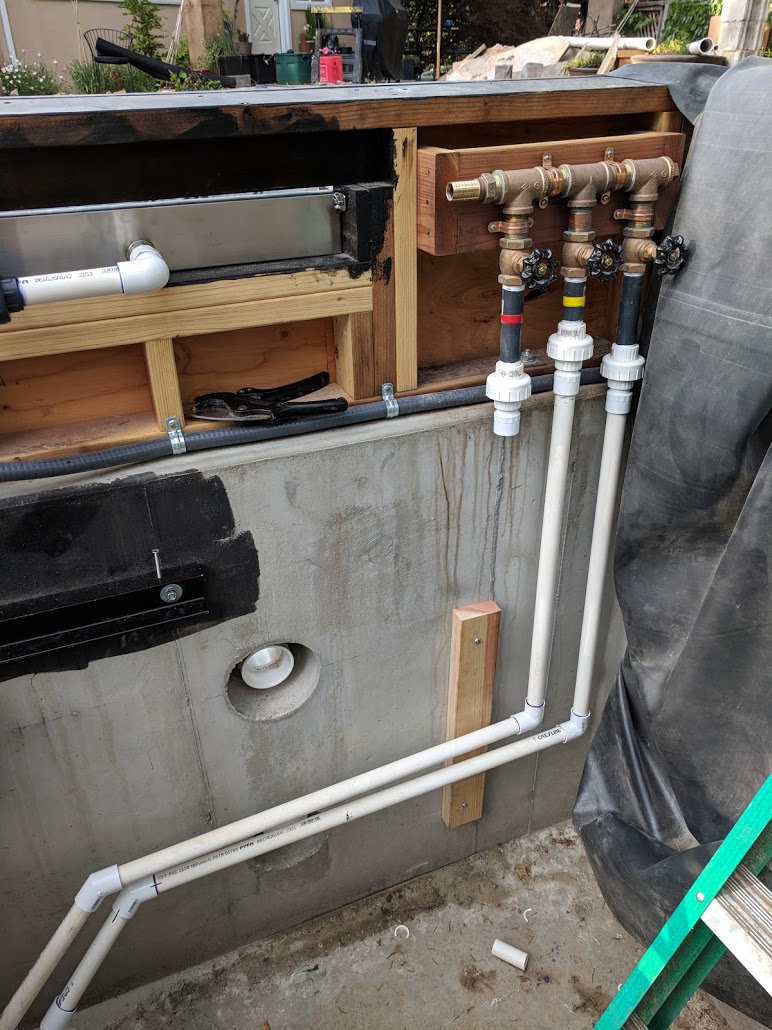
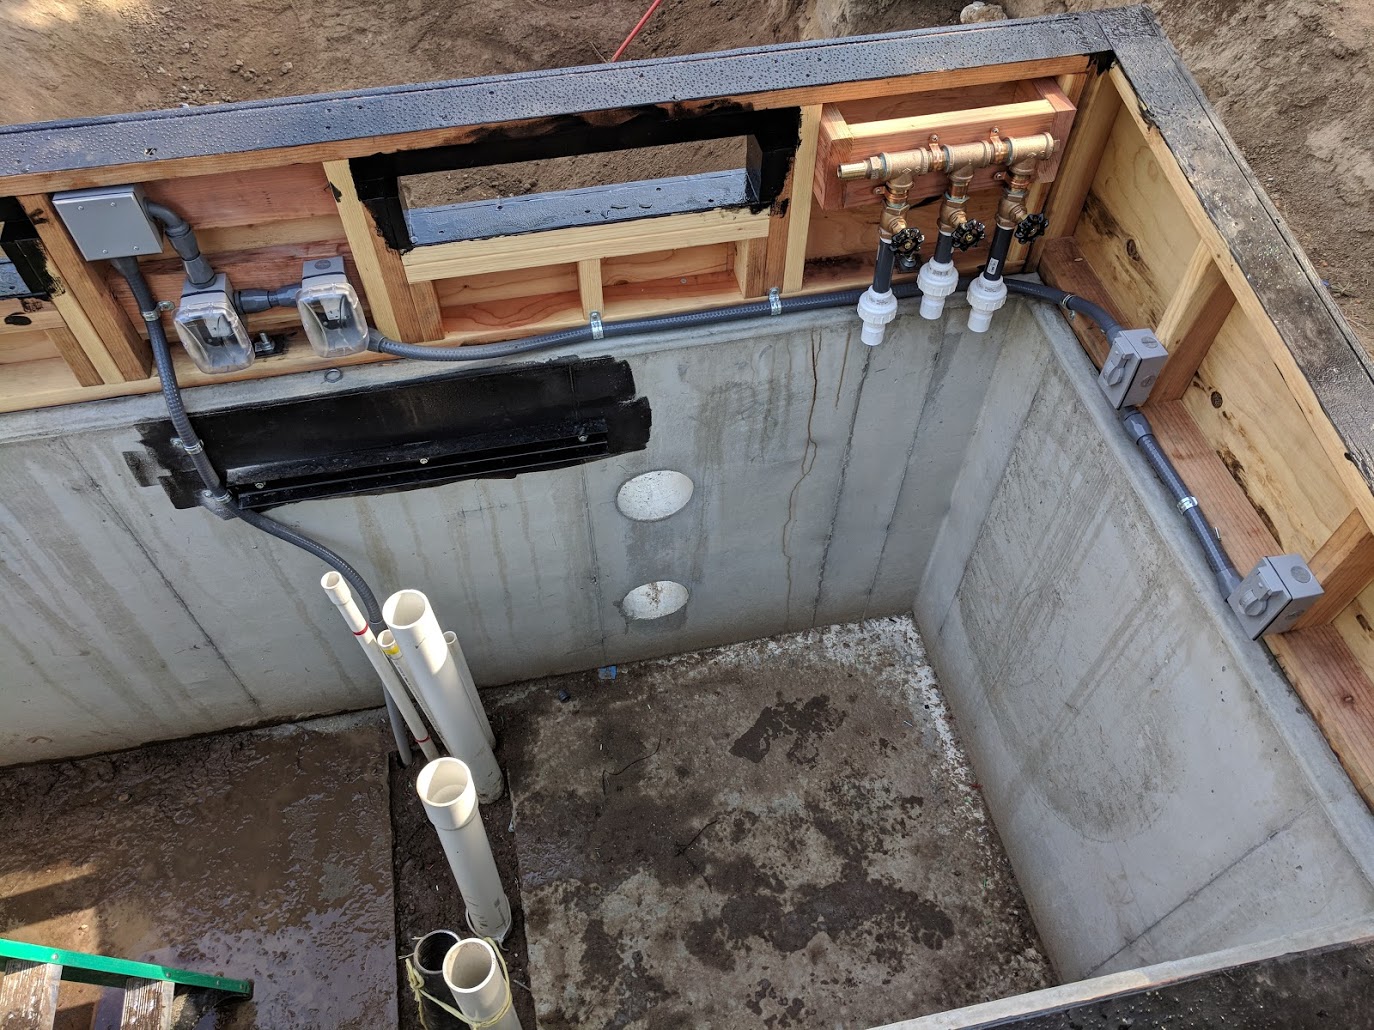
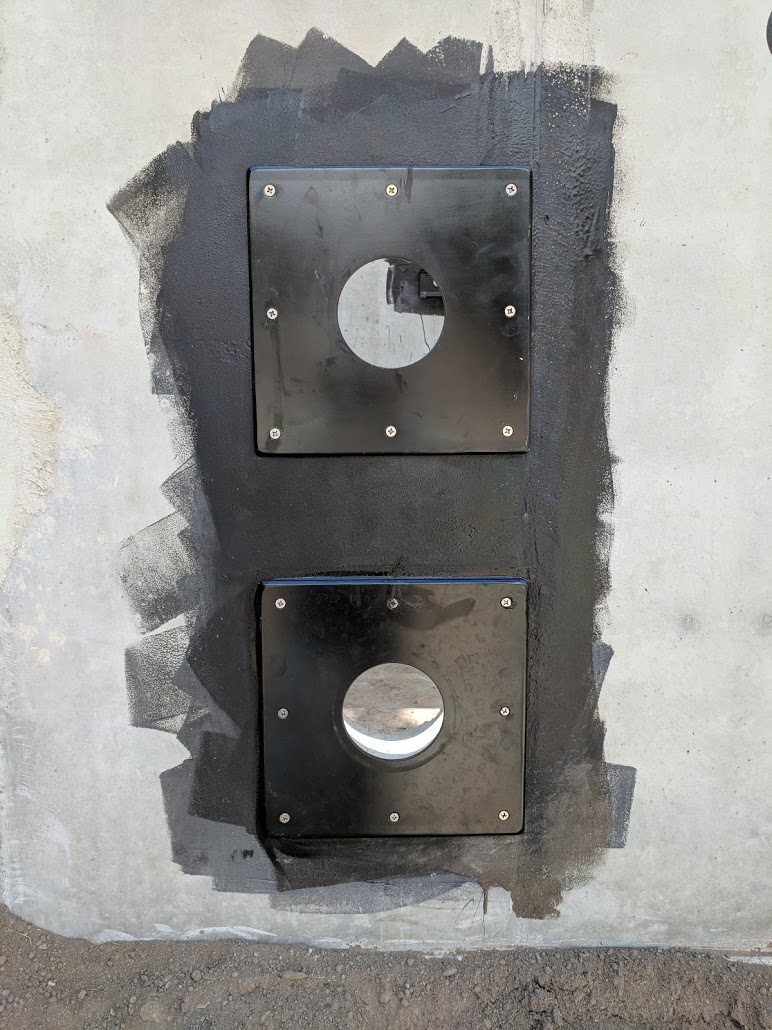
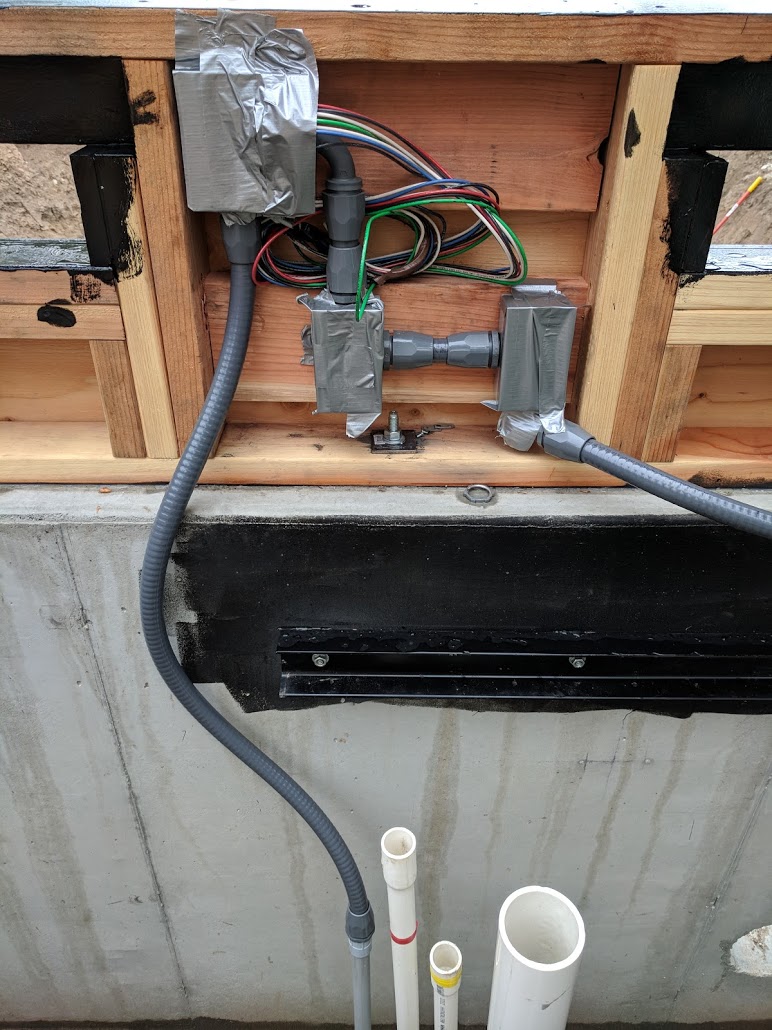
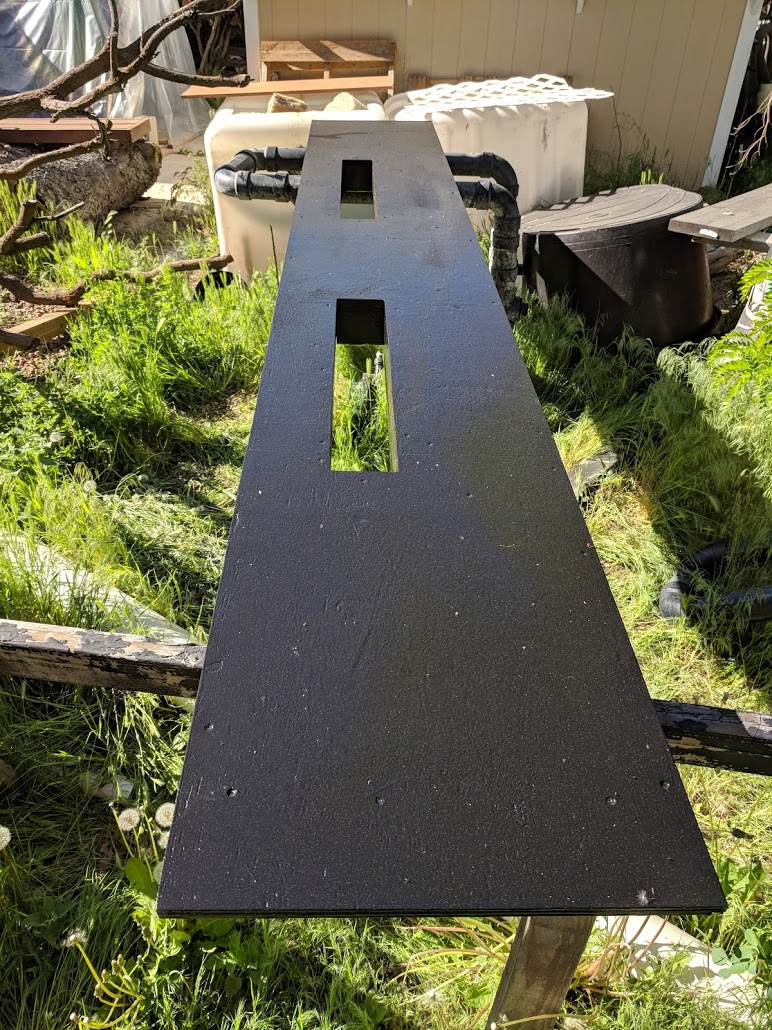
We also screwed the bulkhead plates to the front of the vault. There’s no way to find a bulkhead that would work with six inches of concrete. I fabricated the plates from two 1 foot square by 1/4 inch thick aluminum plates, which I painted with an epoxy-based automotive paint. Aluminum and concrete normally don’t react well together because aluminum will chemically accelerate the deterioration of concrete. To prevent this, I painted the plates and used FlexSeal on the concrete around the water return holes. This will create enough of separation that they should play nice together. I also added liberal application of silicone caulk over the FlexSeal (added protection) and attached the plates to the vault using stainless steel screws and plastic anchors.


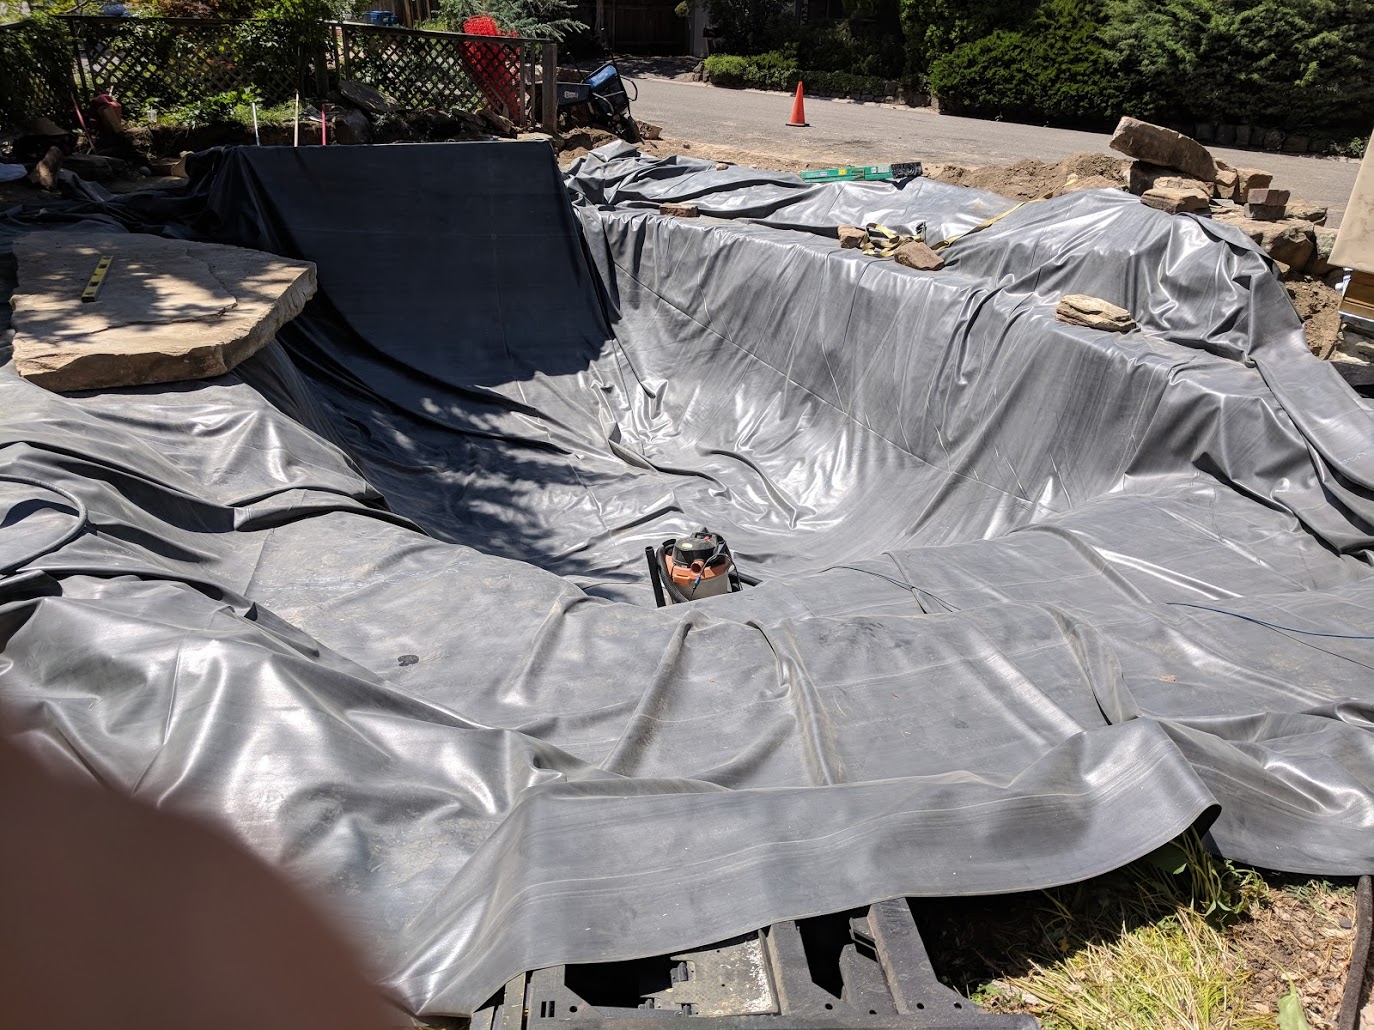
We starting laying the liner underlayment around 2:30 p.m. and it was mostly finished by the time we wrapped up for the day. Assuming the weather holds, the EPDM liner will be in tomorrow!
Weekend #2 Update
Not much with the pond hole happened on Friday. Around 9 a.m. the electricians arrived and began working on the wiring. They added a new breaker and cleaned up some bad wiring, installed by the previous homeowner for the pump on the original pond. As you can see in the pictures, the vault wiring is almost finished. They will be returning tomorrow (Monday) to complete the job.


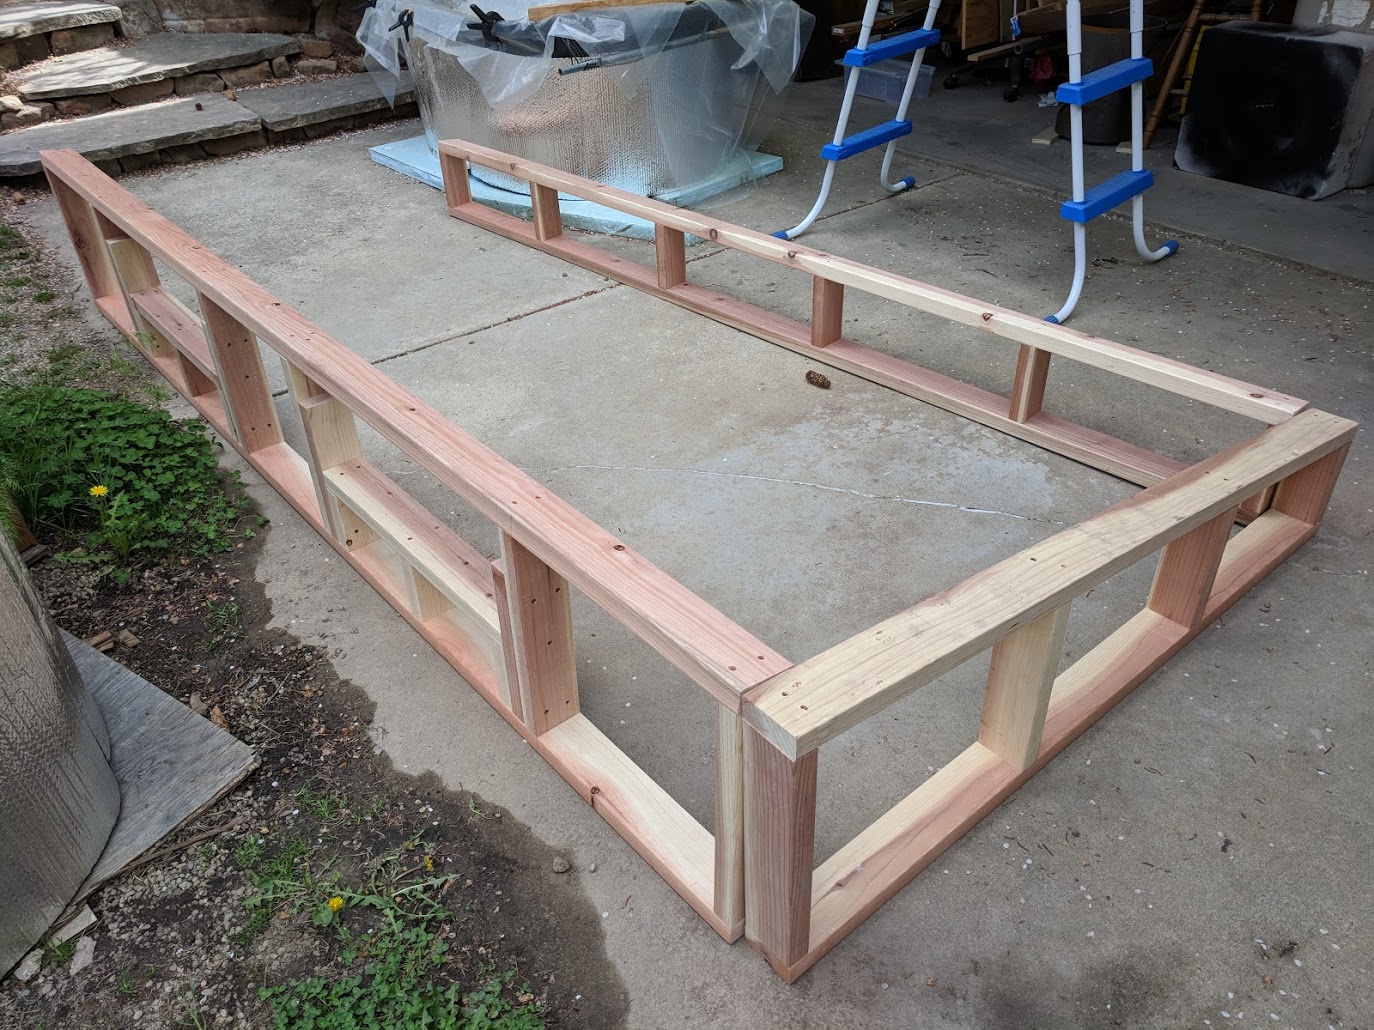
Saturday was beautiful and I spent the day finalizing the installation of the walls for the vault housing. I drilled 1/2″ holes in the top of the vault walls and installed anchors. This allowed me to bolt the housing to the top of the vault. The vault housing is now attached permanently. I built the housing ahead of time so I would be ready. I choose redwood and normal CDX plywood for the walls. As most of you probably know, redwood is moisture resistant and makes a good building material for this type of project. Pressure-treated lumber should never be used near ponds because it contains chemicals that are harmful to fish. CDX plywood is rated for some moisture exposure, so it is also a good choice where moisture may be present occasionally. To make the housing more water resistant, I coated external side of the walls with FlexSeal. When FlexSeal cures it is safe for fish and it comes in black, which will look good for how I will finish the exterior.


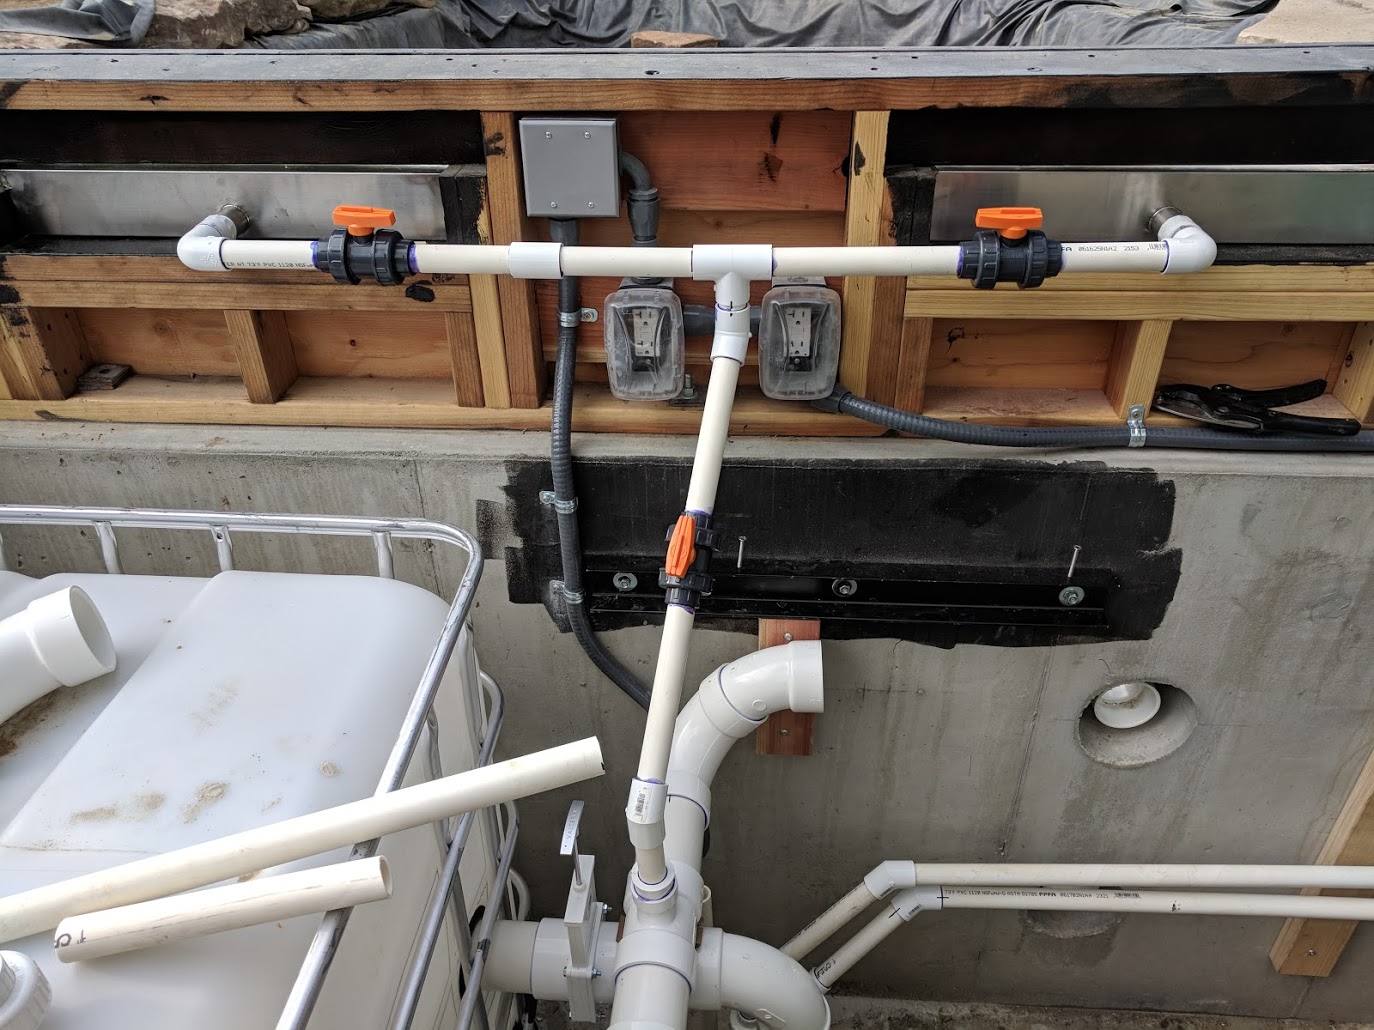
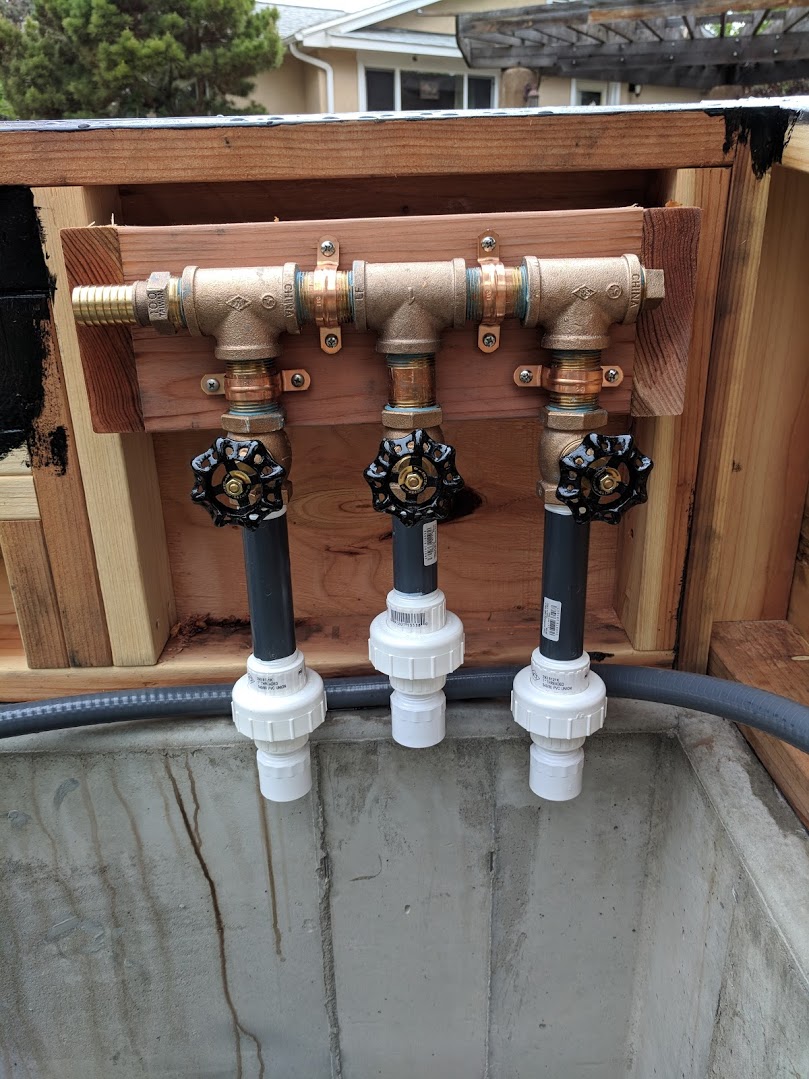
I built the pressurized air manifold a few months ago while we were still waiting for the project to begin. While designing this air system, I did a fair amount of research about the appropriate valve types to control air flow. The two most common valves you find in plumbing supply or big box stores are gate and ball valves. While these valves are great for on/off they’re not really meant for flow control. Most sources recommend needle valves or globe valves for controlling the flow of a gas or fluid. Large needle valves are hard to come by, and very expensive, so I chose globe valves to fine tune the air running to the bottom drain diffusers. As you can see in the photos above, there are unions after the valves. This type of union would not work for high pressure systems, but the Matala Hakko 120L air pump only runs at about 2.84 PSI so these will be just fine.
I’m looking forward to getting the wiring finished and hope the weather improves so the the Urban Escapes crew can work tomorrow.
Week 2 progress report.
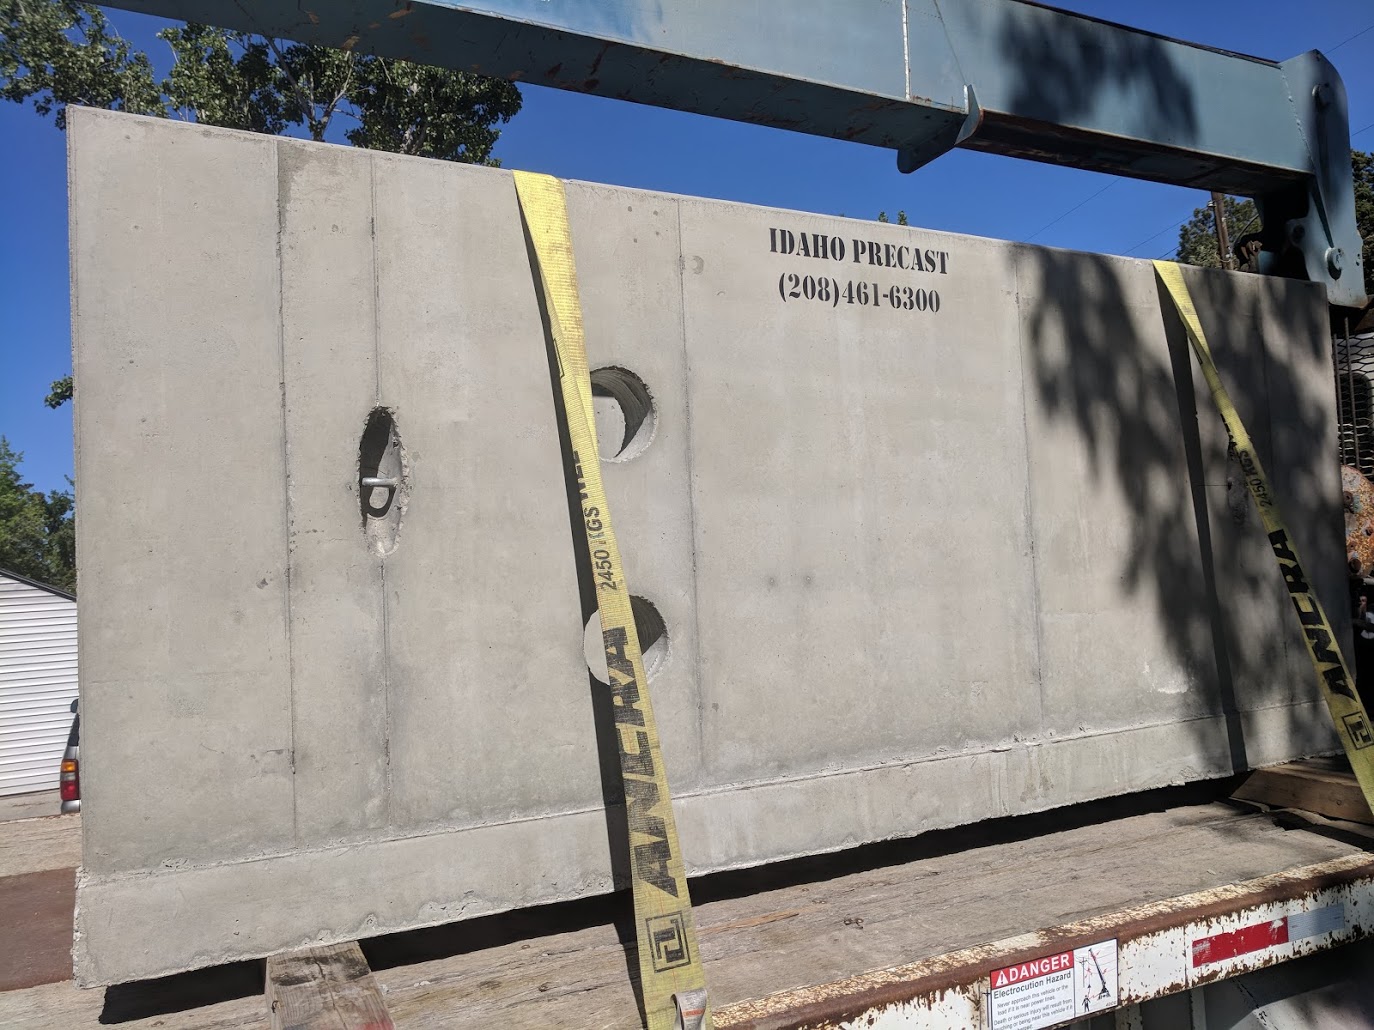
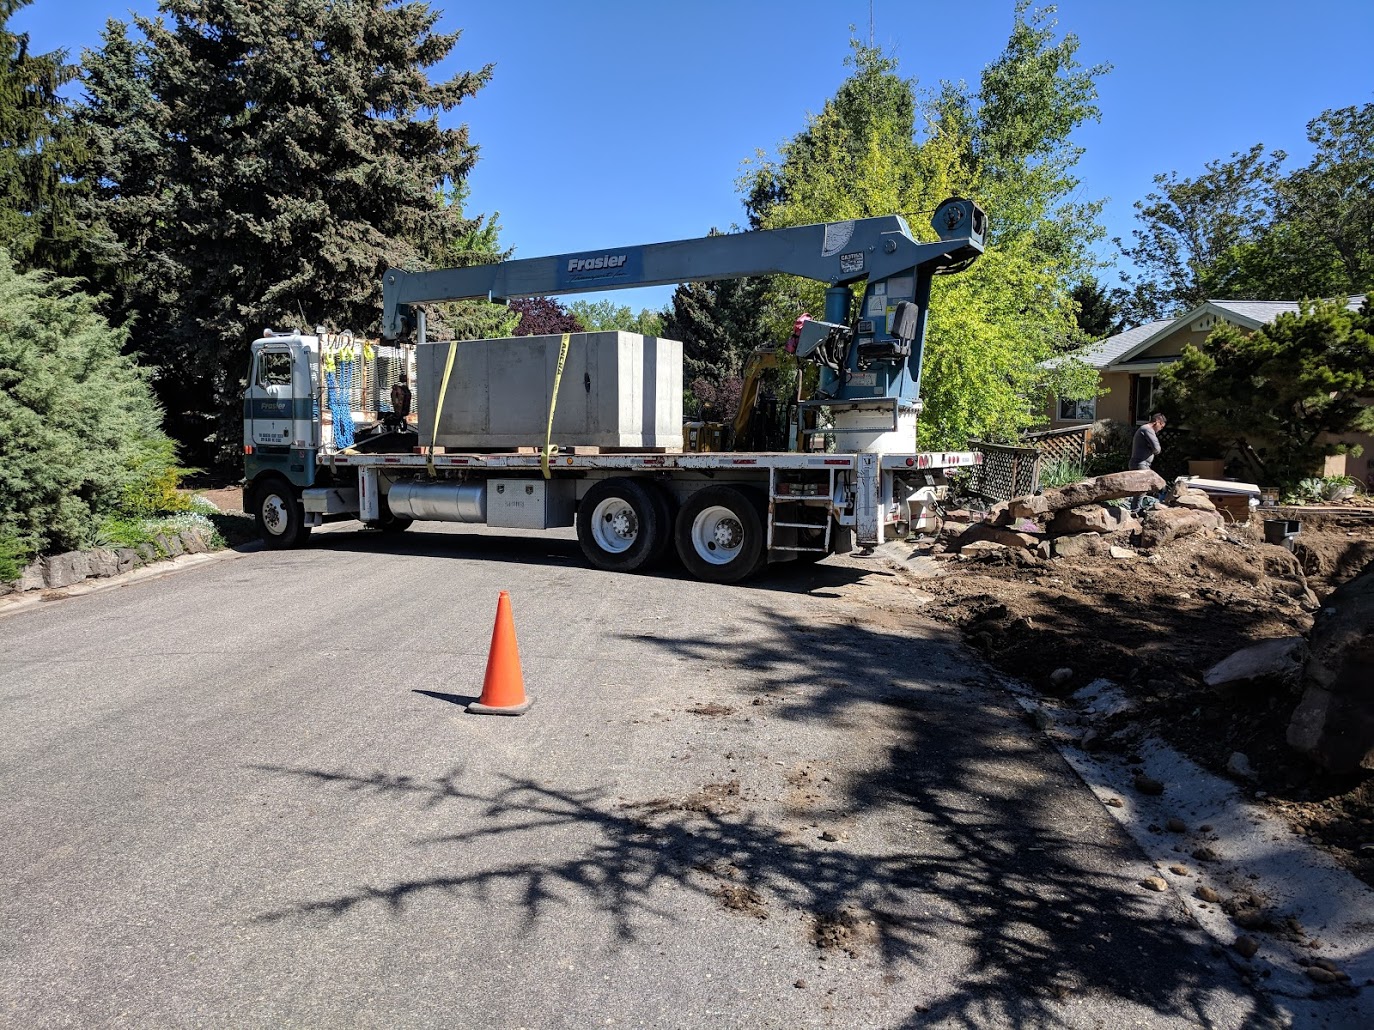
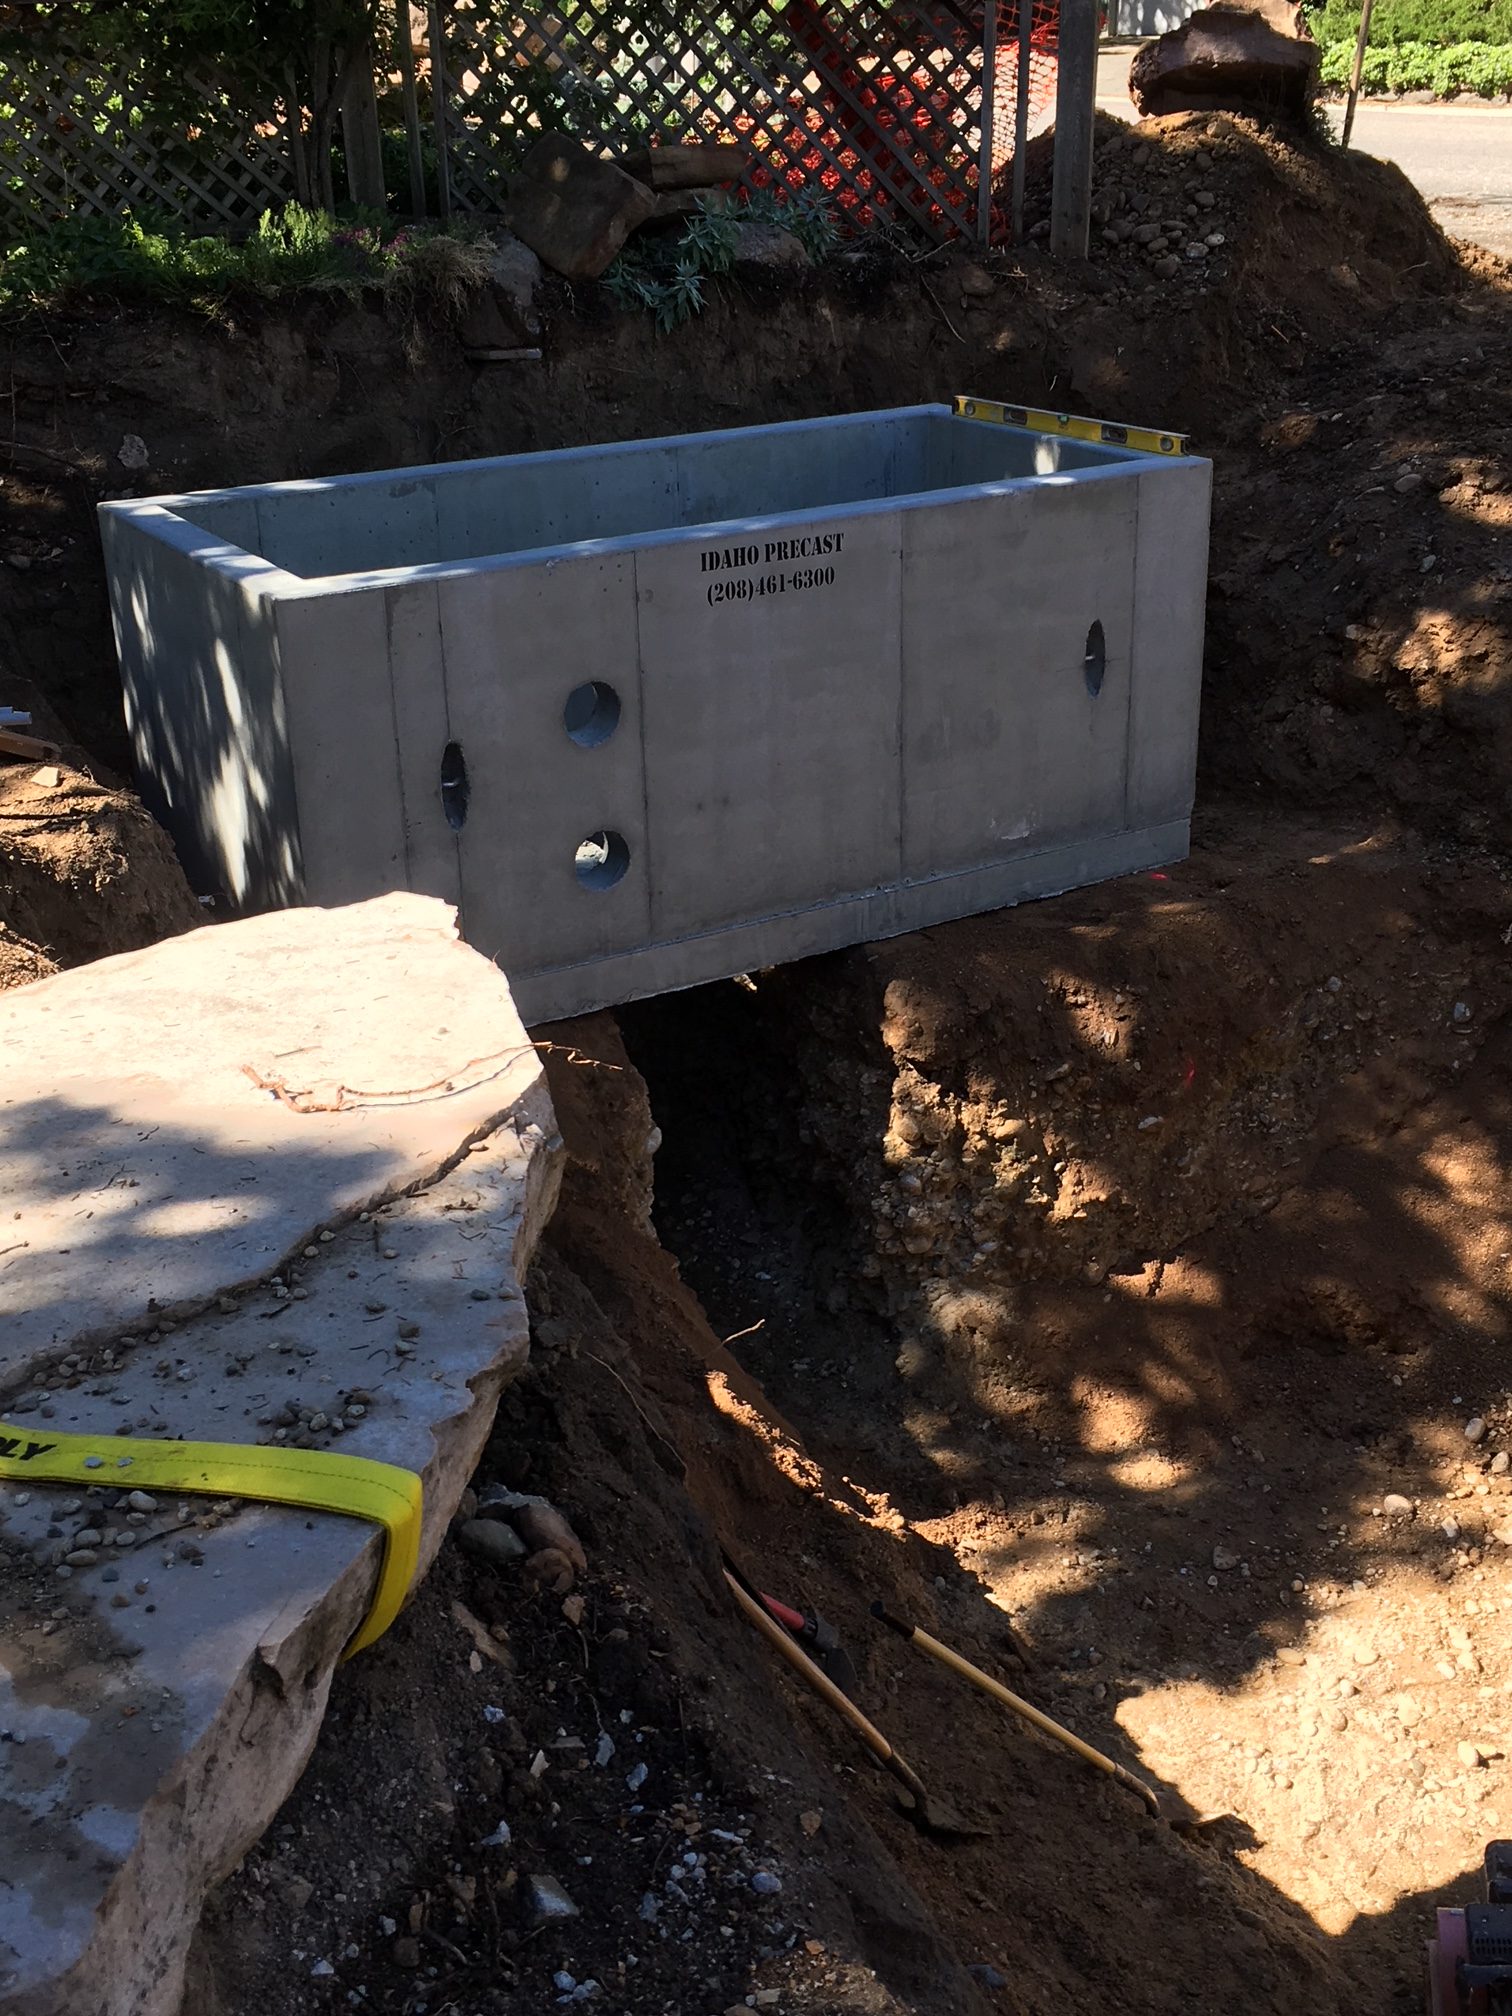
We are finally done taking stuff out of the pond hole, and now we’re putting stuff in it. The week started on track and the vault was delivered on Monday. It was pretty exciting having that show up and watching the the delivery crane swing it into place. It was a really good feeling.


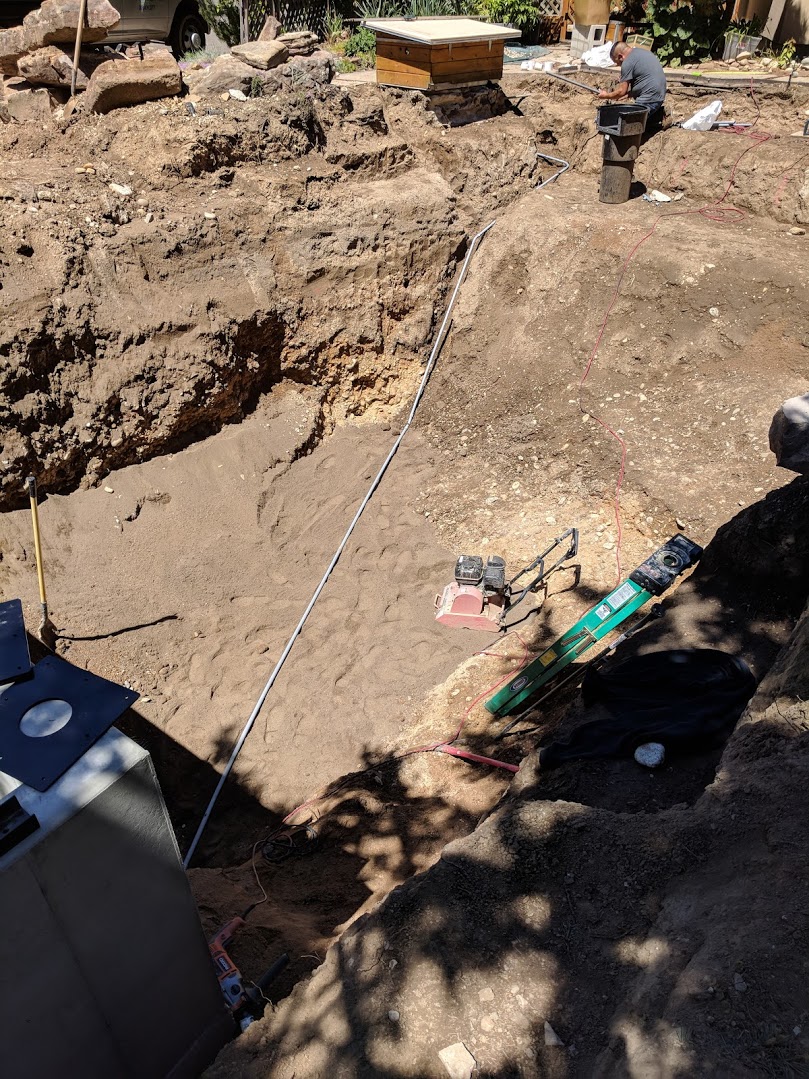
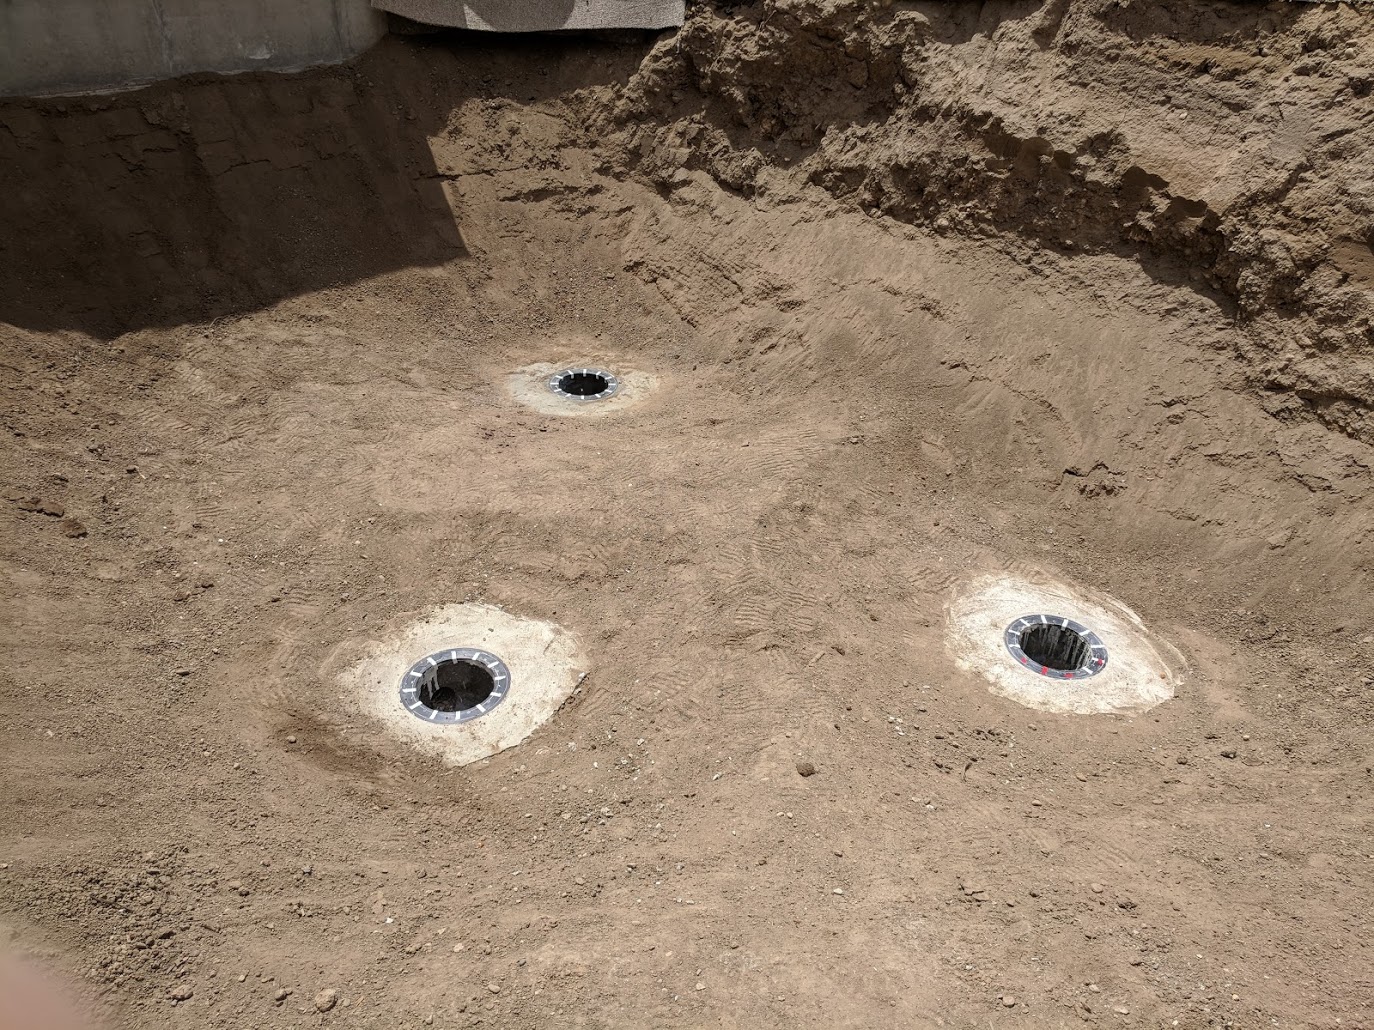
The bottom drain plumbing was finished up by Tuesday and we started bringing in fill dirt to shape the bottom of the pond. I’m a little disappointed with plumbing though. I think too much solvent cement was used on the joints, though I did some tests and they seemed strong enough.


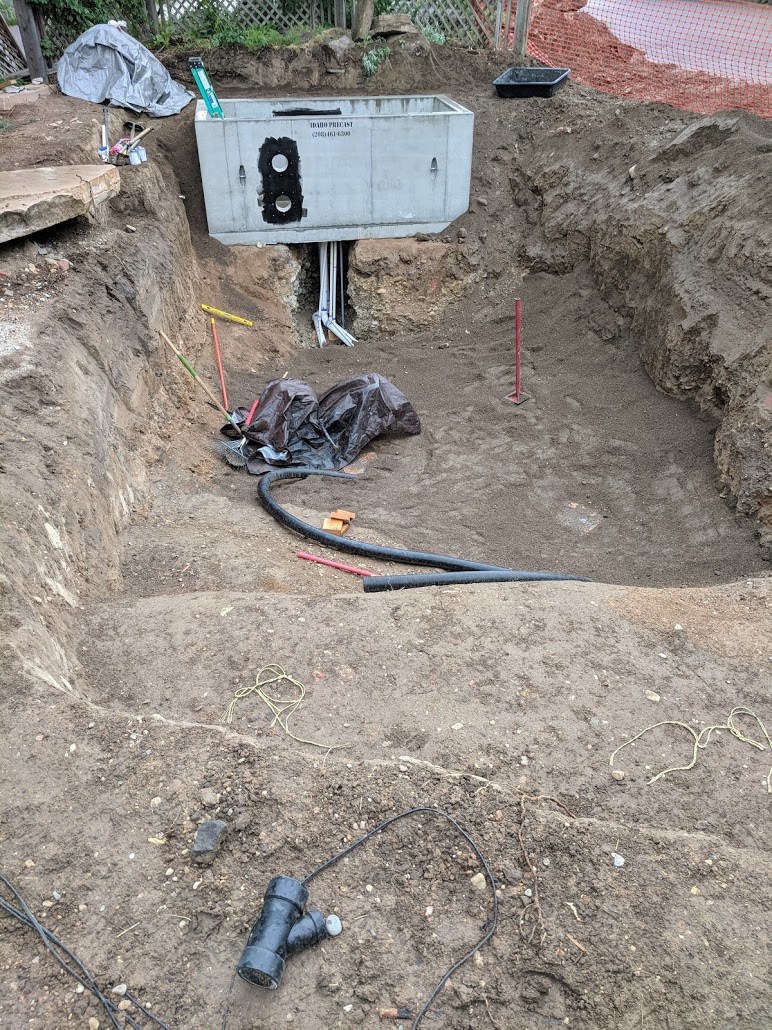
Wednesday started a little rocky. One of the main workers (he’s also the backhoe driver) from Urban Escapes called in sick so we started a man down. We were able to get the trench under the vault filled in and reasonably compacted. Shortly after that one to many loads of fill dirt dumped was dumped in the hole and needed to be removed. While trying to remove the extra dirt, the trackhoe dug into one of the recently compact walls. This will present some challenges when trying to build this wall back up. After that three of us grabbed shovels and we shoveled dirt into the trackhoe bucket to be carried out.
Thursday ended up being a really nice day to work. The Urban Escapes crew arrived at 8:30 a.m. and decided project to too wet to work and decided to head home. The weather calmed down by mid morning and I started working on the structure on the vault. The electrician is showing up tomorrow to run power to the vault, and fix some of the issues with the existing pump box, so I needed to get this in a workable state.